4 Simple and Fun Insect Crafts for a Cute Bug Party
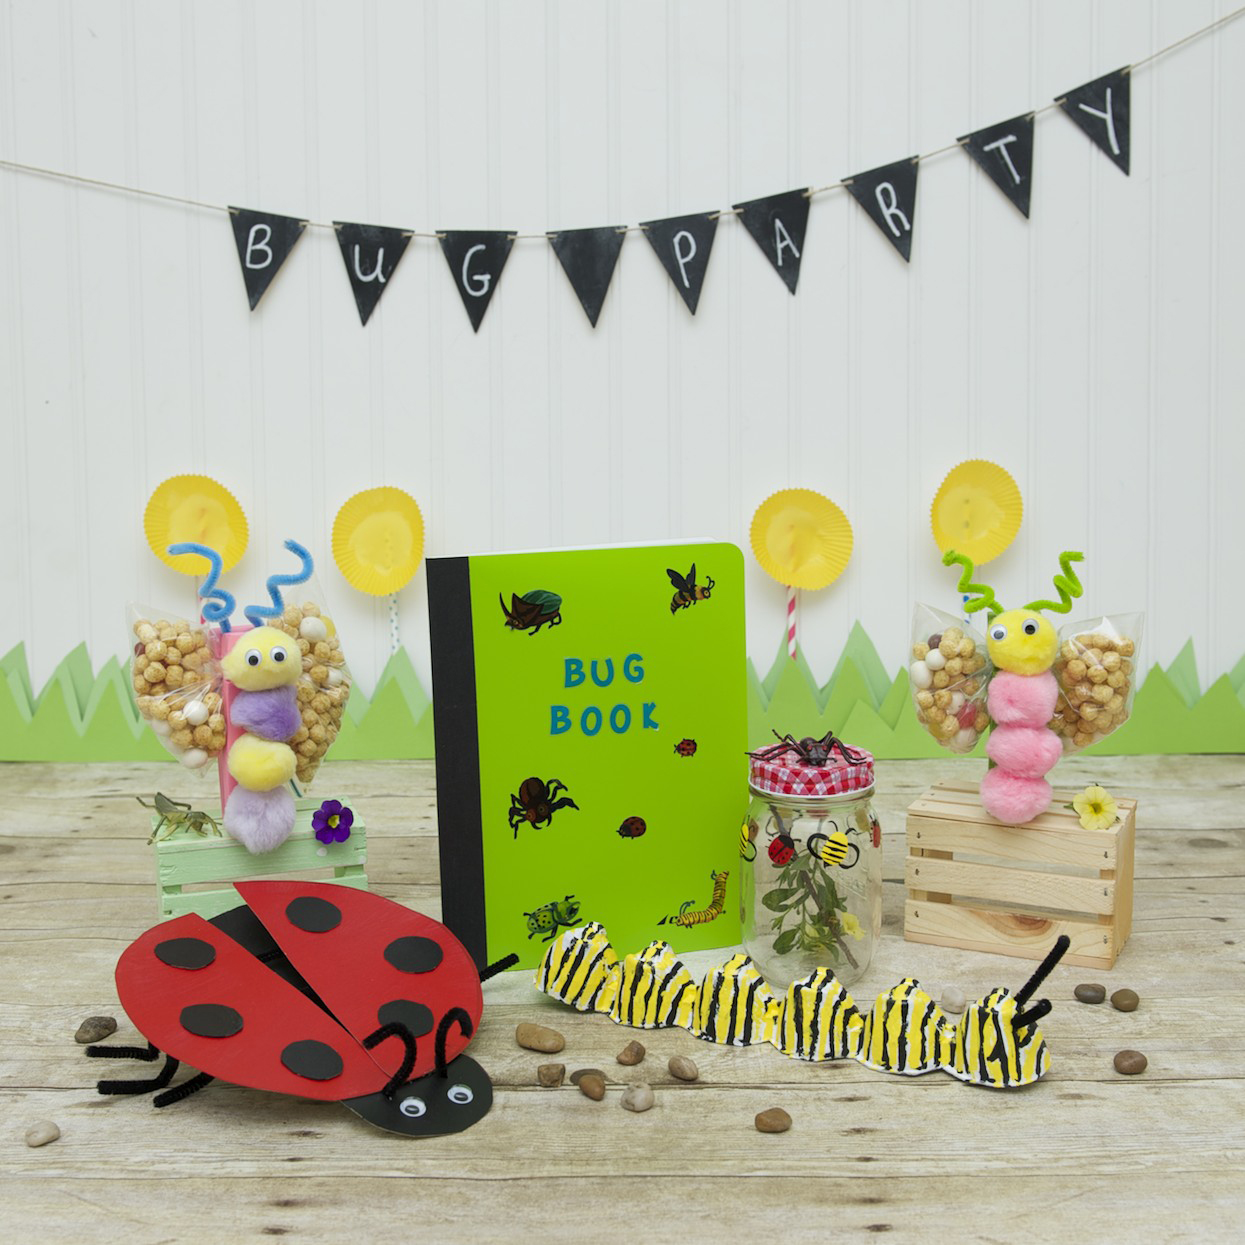
When the idea came up to have a bug-themed party, I was SUPER excited.
I have three boys and they ALL love bugs, so of course now I love bugs. I picked out our favorite bugs to catch in the backyard and even added a cute decorative bug jar w/ bug book.
Check out these BUGGY ideas!!
These are great crafts to get your kids EXCITED to learn about bugs! Dirt and insects, what mom wouldn’t LOVE that?!?
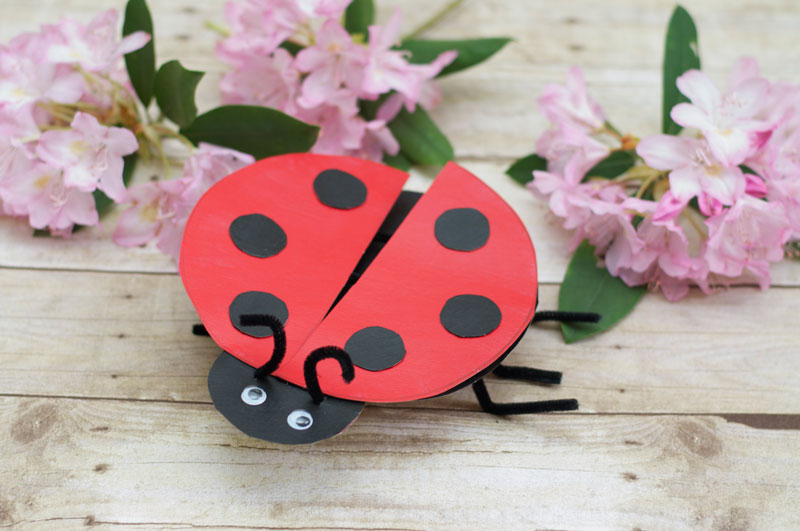
Cereal Box Lady Bug
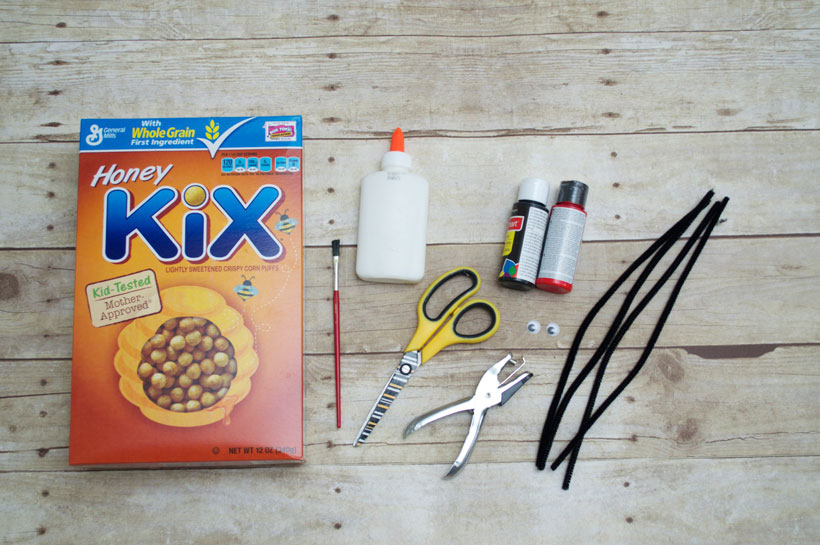
Materials
- Kix cereal box
- Red and black paint
- Black pipe cleaners
- Glue
- Googly eyes
- Hole punch
- Scissors
- Paint brush
Getting Started
Of course (as with ALL of my Kix party ideas), I love using a cereal box for one of the crafts. It always works out perfect! Since we know the material we’re using, what’s a cute bug to catch?? A ladybug of course (my FAVORITE insect)!
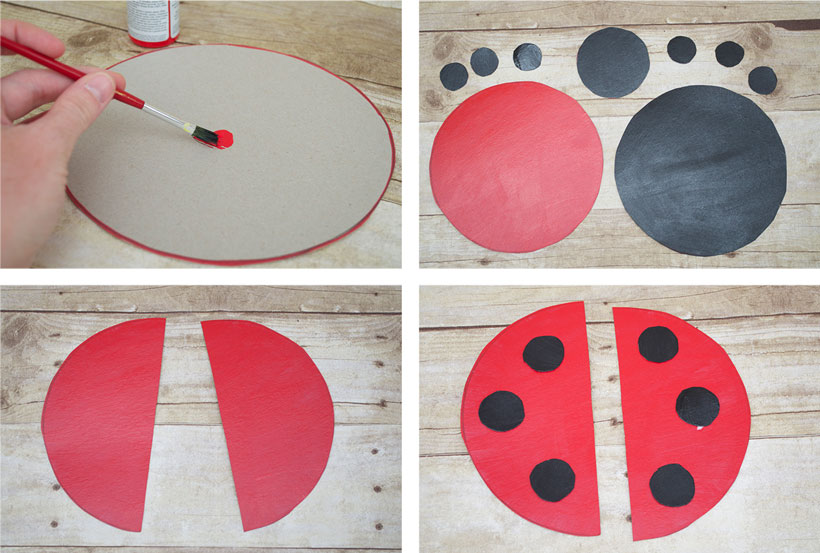
Step 1 – Trace and Cut Out Your Ladybug
Lay your cereal box out flat and trace out your circles. I used a LARGE bowl for the body and wings and two different sized spice jars for the head and spots.
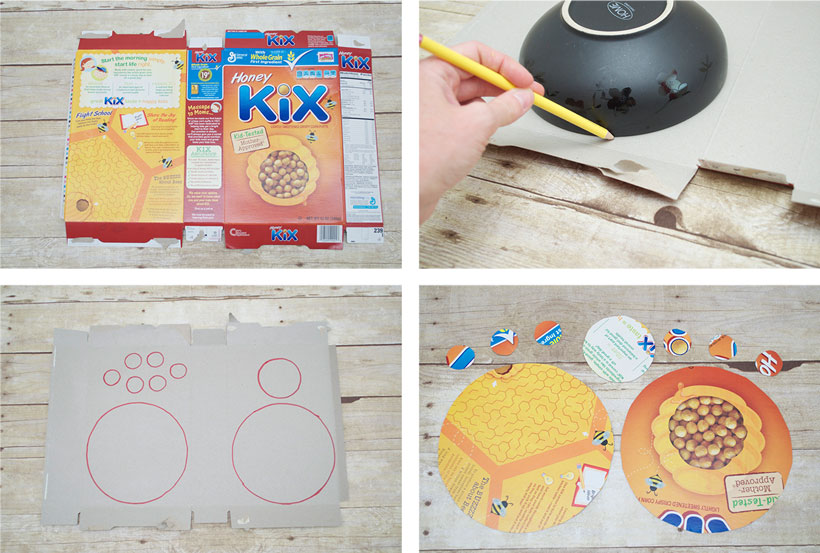
Step 2 – Paint Your Ladybug and Put Wings Together
Paint one of the larger circles red and the remaining circles black. Let dry 20 minutes.
Then, cut your wing in half and add your black spots with GLUE.
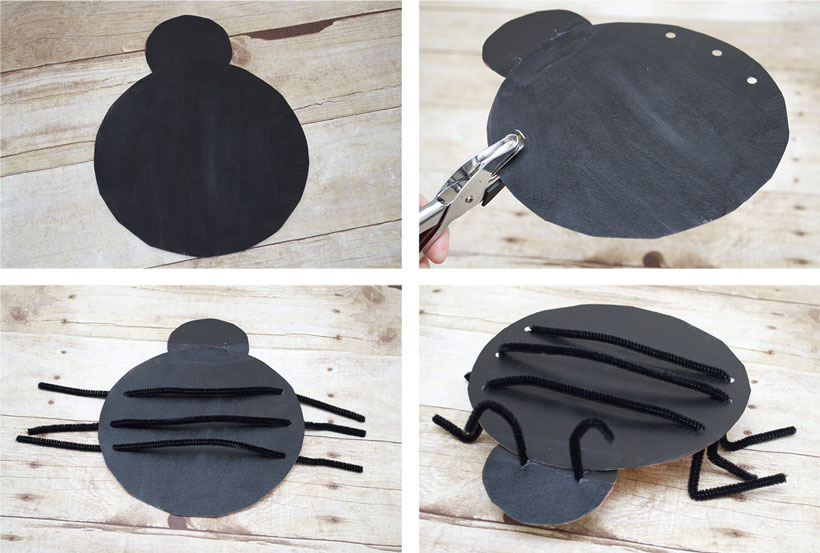
Step 3 – Add Your Head and Legs
NOW it’s time to add the legs and head. First, glue the head to the body. Let dry 10 minutes.
Use a hole punch and place your pipe cleaners through the holes. Bend the legs out, and voila…cute little legs!! Add a 2 small holes at the top of the head and INSERT in your ladybug’s antennas.
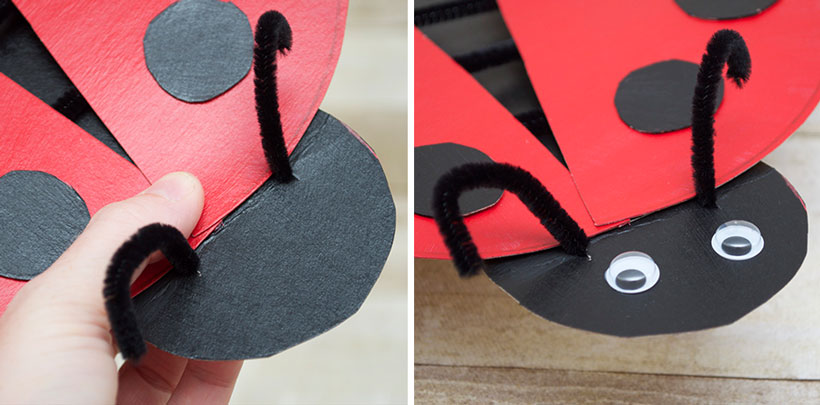
Step 4 – Add Wings and Eyes
Time to finish off this cute ladybug by adding wings and eyes.
Add glue to the BOTTOM of the head and firmly hold the wings in place for a few seconds. Let wings and eyes dry 10 minutes.
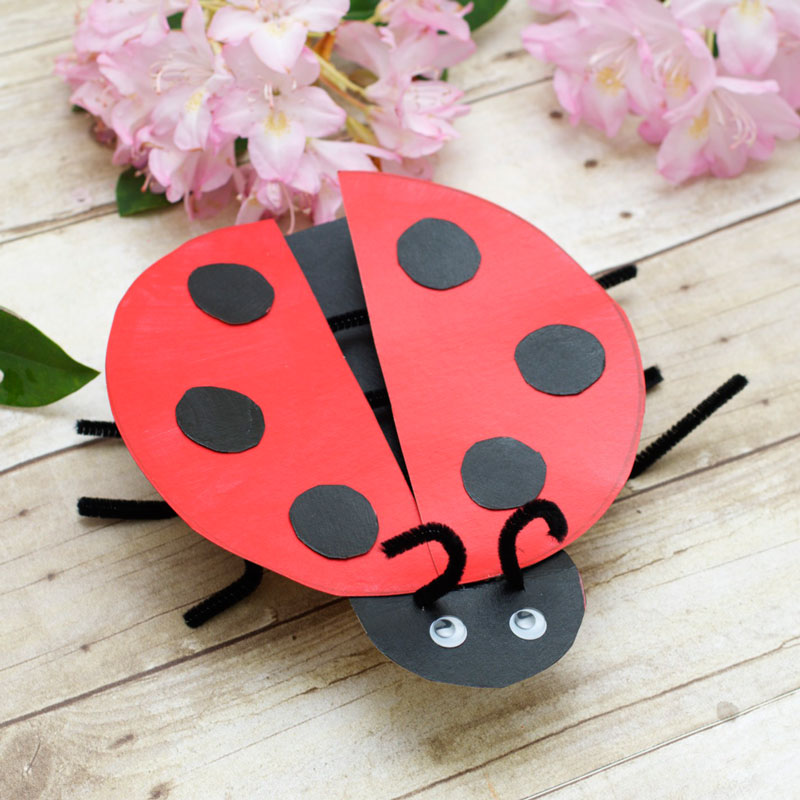
Now you are READY-TO-PLAY with your ladybug!
Finished Cereal Box Lady Bug
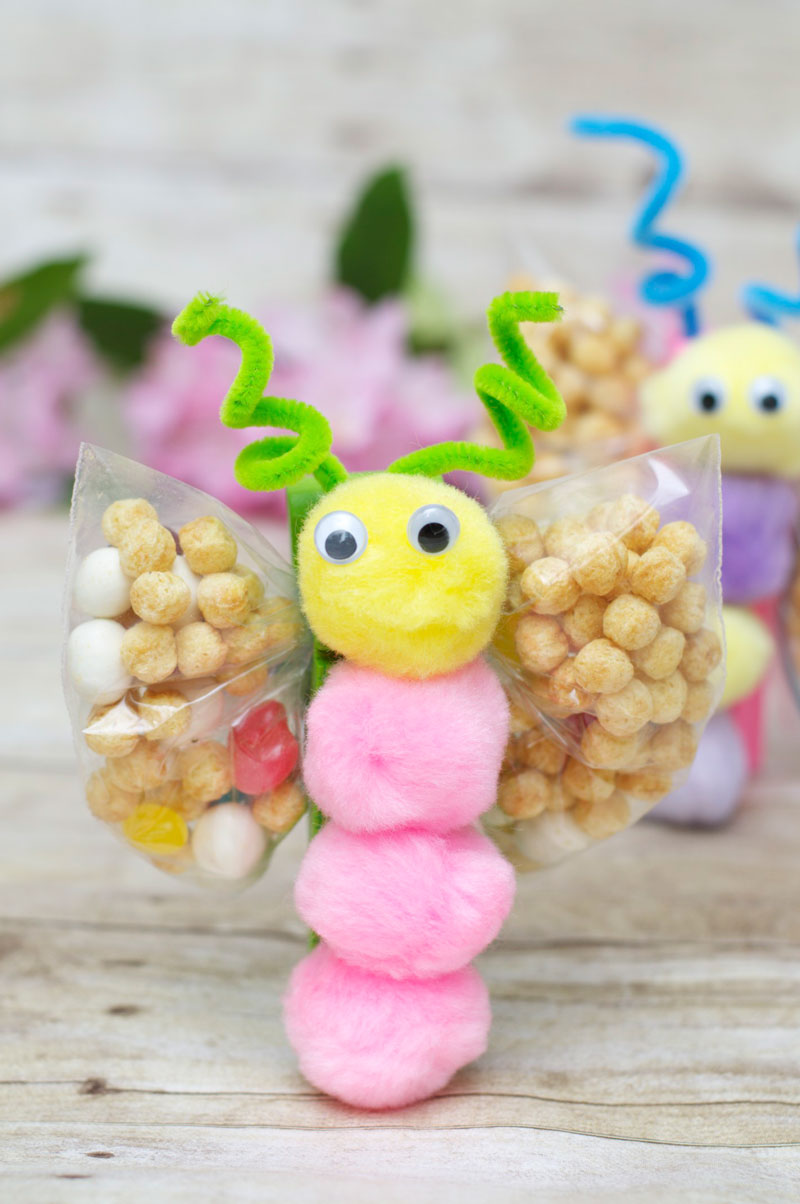
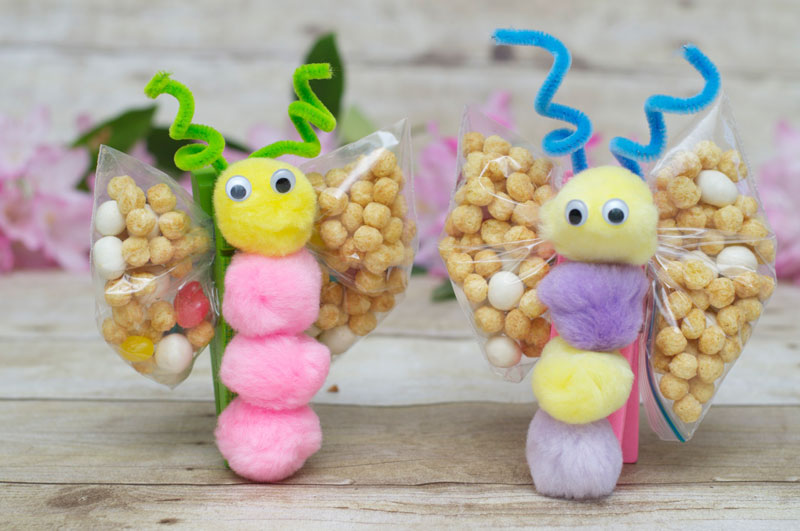
Giant Clothespin Butterfly Party Favor
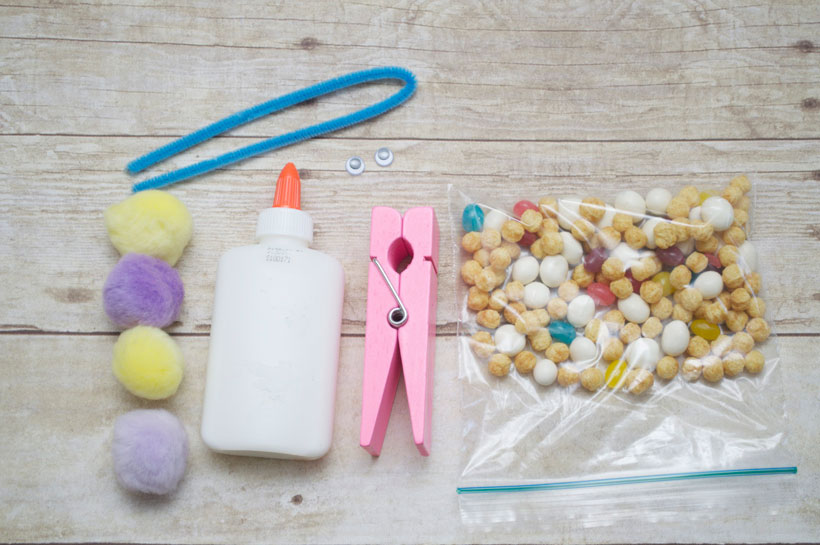
Materials
- Giant clothespins
- Large pom pom balls
- Zip lock bag
- Pipe cleaner
- Glue
- Treats
Getting Started
I loved the idea of using Kix cereal and other goodies for the inside of the butterfly wings. A PERFECT party favor for the kids to take home. I was inspired by the idea from a previous Kix butterfly craft and wanted to make my own ‘GIANT’ version.
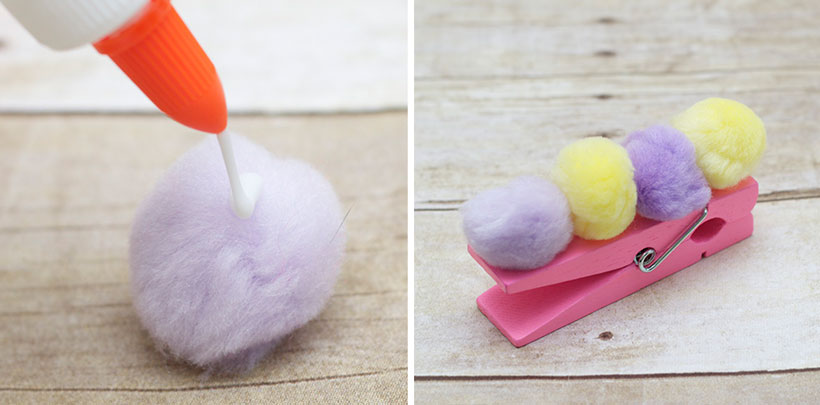
Step 1 – Make Your Butterfly’s Body
We used LARGE pom pom balls for the body of our butterfly. Add a small amount of glue and firmly place them on the large clothespin.
While waiting for the pom poms to dry, you can add your googly eyes too!
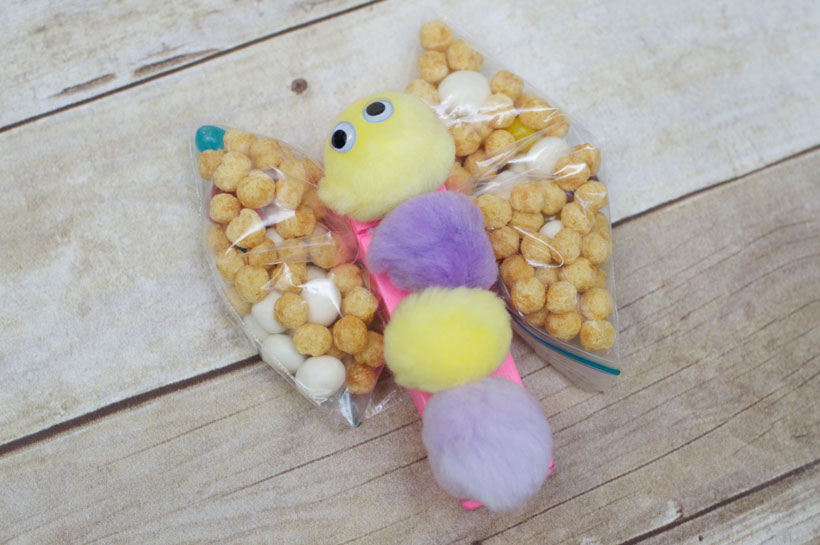
Step 2 – Add Your Treat Wings
Add 2 handfuls of Kix cereal and other goodies to your bag. Bunch up the MIDDLE of the bag and place in-between the clothespin.
If you don’t have a large clothespin, a regular size one will work perfect as well. But, we wanted to go BIG for this party!
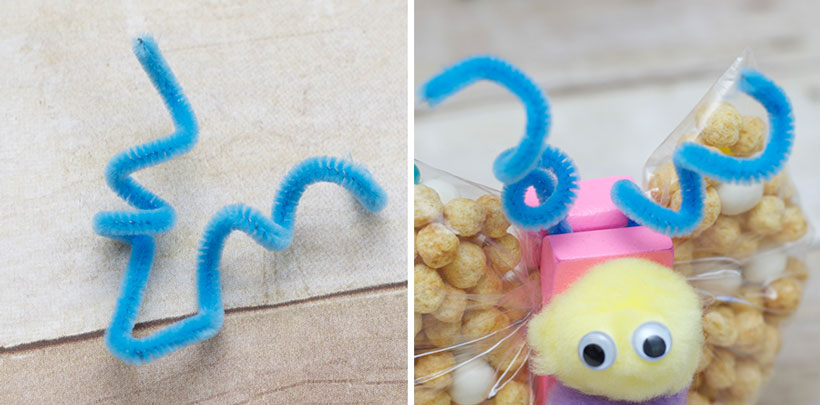
Step 3 – Cut and Add Antennae
Bend your pipe cleaner over and using your FINGERS to make the swirl on the antennae!! So simple, the kids will love taking their healthy treat home!
Finished Giant Clothespin Butterfly Party Favors
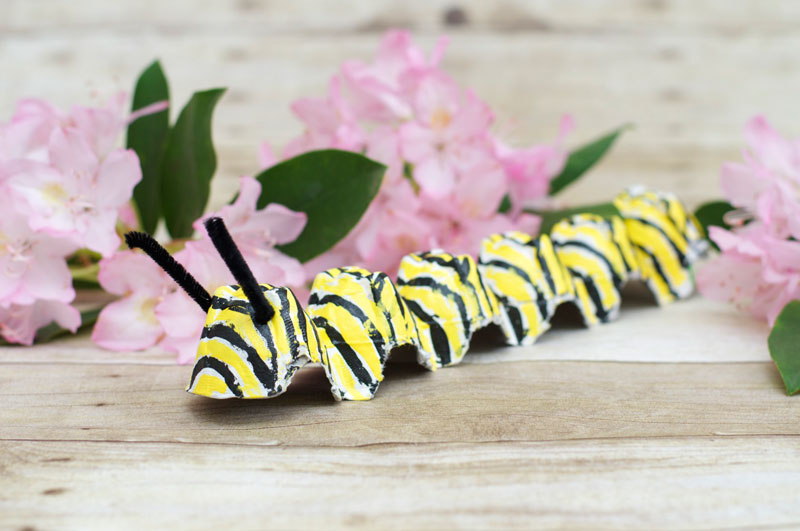
Egg Carton Caterpillar
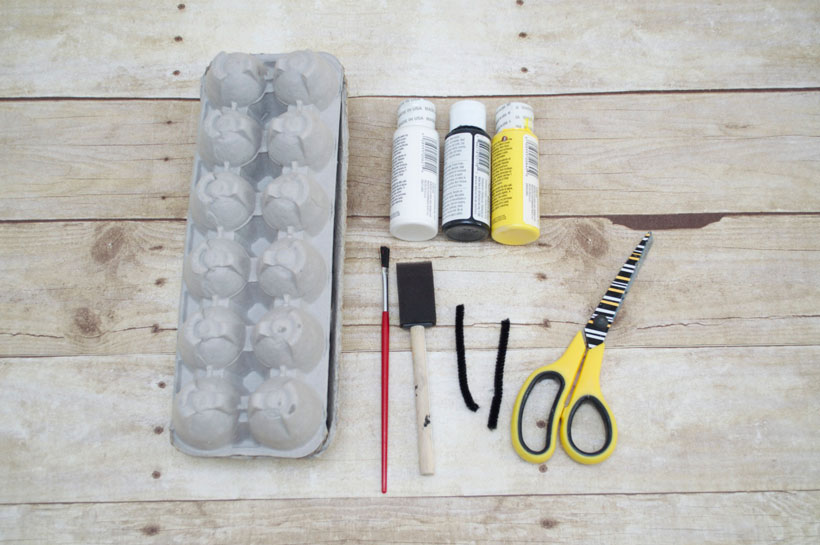
Materials
- Egg carton
- Paint
- Pipe cleaner
- Scissors
- Paint brush
Getting Started
One of my boys’ favorite bugs to catch are the caterpillars. So I thought making a Monarch caterpillar would be a fun idea, AND pretty simple for the kids to make themselves.
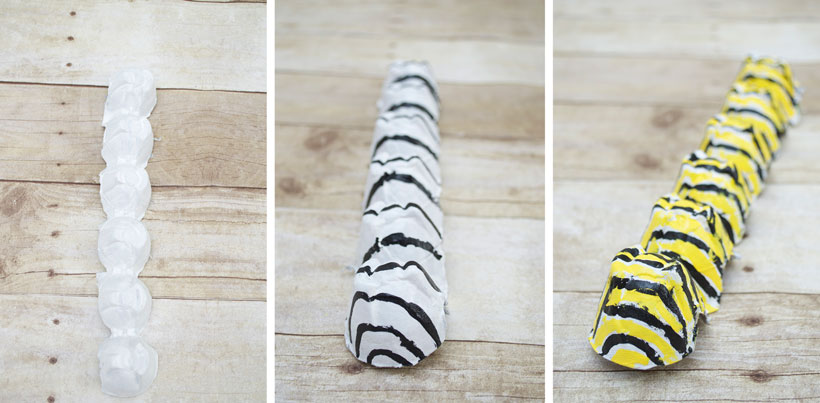
Step 1 – Cut and Paint Your Egg Carton
First, cut your egg carton in two. Using the egg carton half, paint the egg carton white and let dry 10 minutes. Then, add your black and yellow stripes.
Since this caterpillar has NO perfectly straight lines (no matter how the kids paint their stripes), the caterpillar it will turn out perfect!
Step 2 – Cut and Add Antennae
Parents cut a small slit on TOP of the head. NEXT, have the kids gently insert in the caterpillar’s antennae!
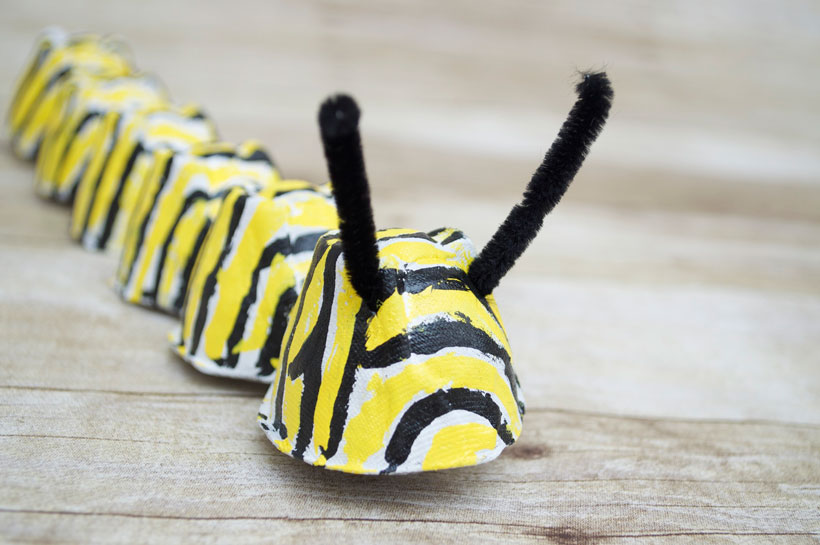
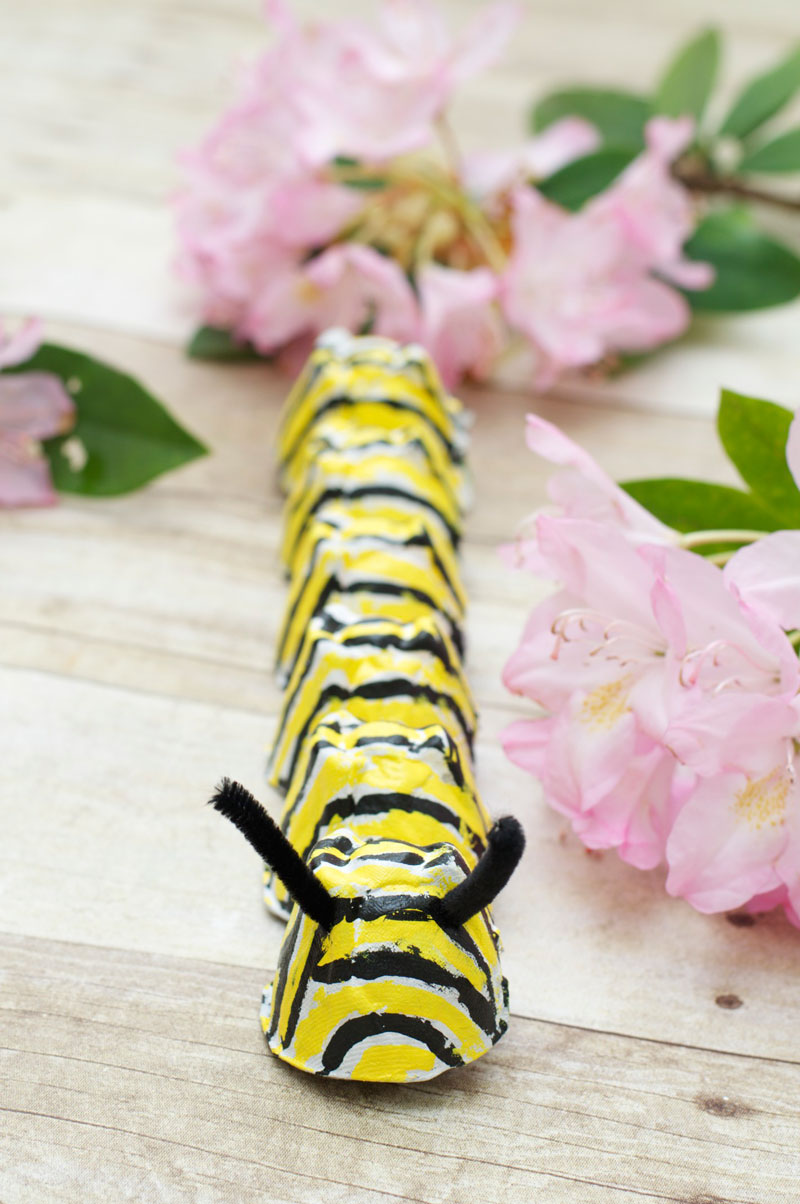
Finished Egg Carton Caterpillar
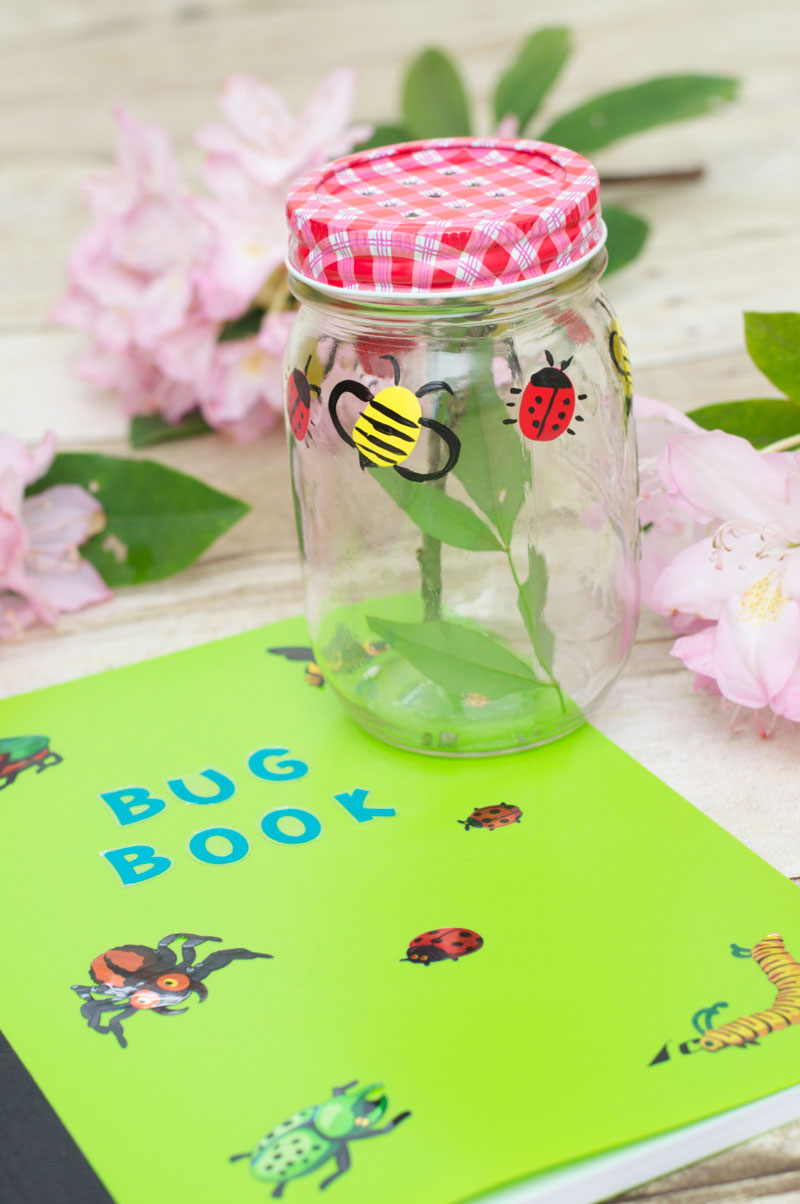
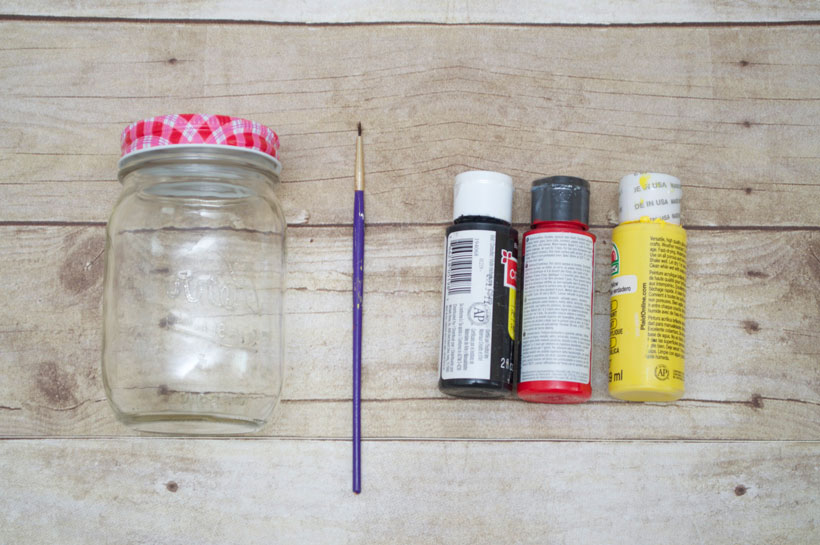
Bug Jar and Book
Materials
- Jar w/ lid
- Paint
- Paint brush
- Notebook
- Stickers
Getting Started
Now that we have all these cute lil’ bugs made, it’s time to make a special jar to collect them with! We even made a BUG BOOK to draw and write about the bugs we collect.
But of course…we’re going to set them free once we’re done!
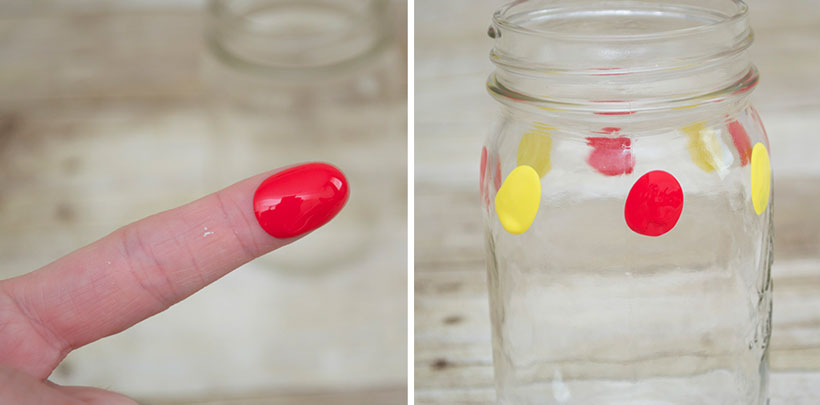
Step 1 – Add Your Thumbprints
We decided to make ladybugs and bees for the TOP of our jar. Add your child’s thumbprints around the top of the jar. Let dry 30 minutes or until completely dry.
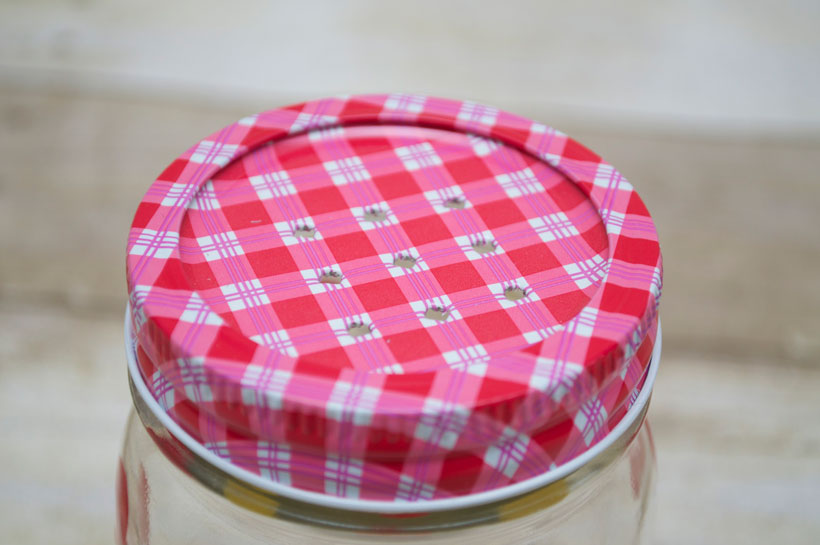
Step 2 – Make Your Air Holes
PARENTS (using a nail and hammer), add the holes to the lid of the jar for the air to come in. A few taps of the hammer should do it!
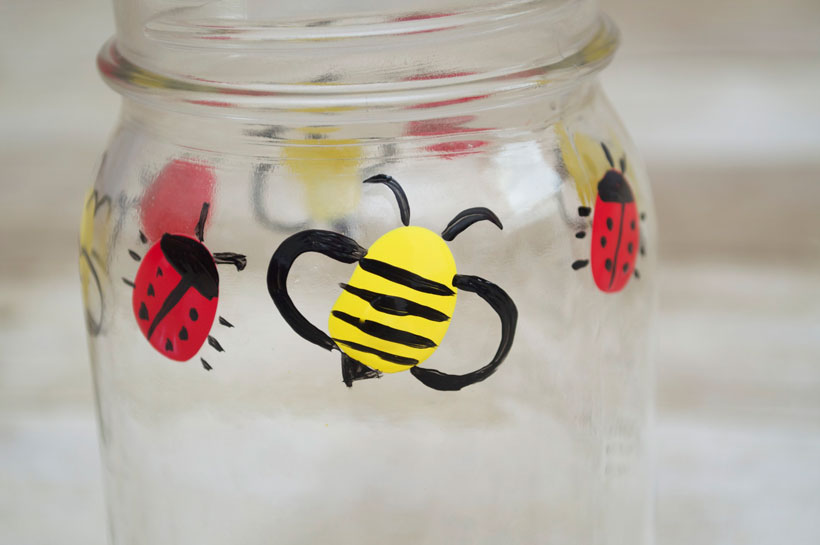
Step 3 – Paint in Your Bugs
Using a paint brush, have the kids paint in their little bugs’ bodies. OH, and don’t forget about their cute lil’ legs and wings!
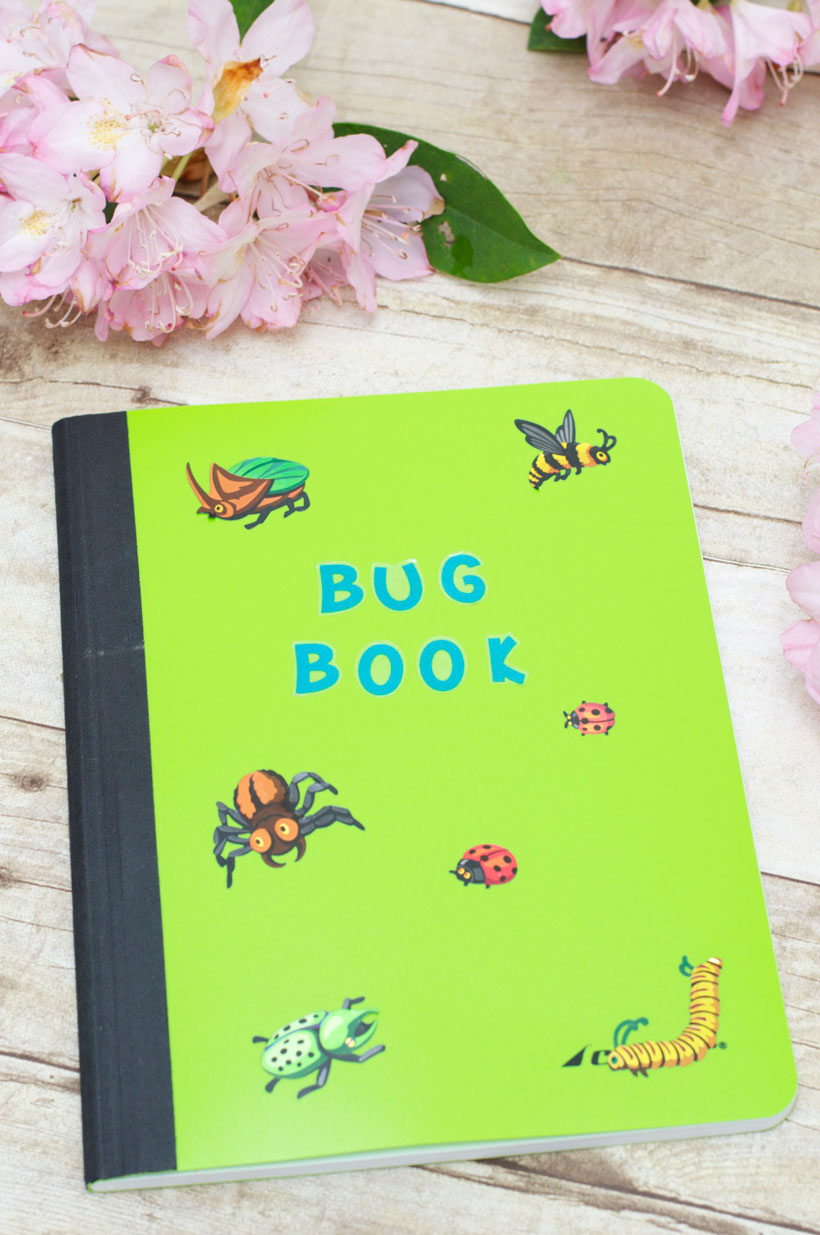
Step 4 – Bug Book
After you catch your bugs, have the kids ADD THEM to a journal. They can draw a picture of their bug and write in what they’ve learned about it!
Below we used a simple green notebook and added some decorative bug stickers we found 🙂
Finished Bug Jar

Now that was a fun party to have for kids. Not only will they enjoy making their bugs to TAKE HOME, but they can also learn a little about the bugs they make too.
As always, I hope you found some great and buggy inspiration.See you next party!!


