5 Fun Cinco De Mayo Inspired Music Party Crafts for Kids
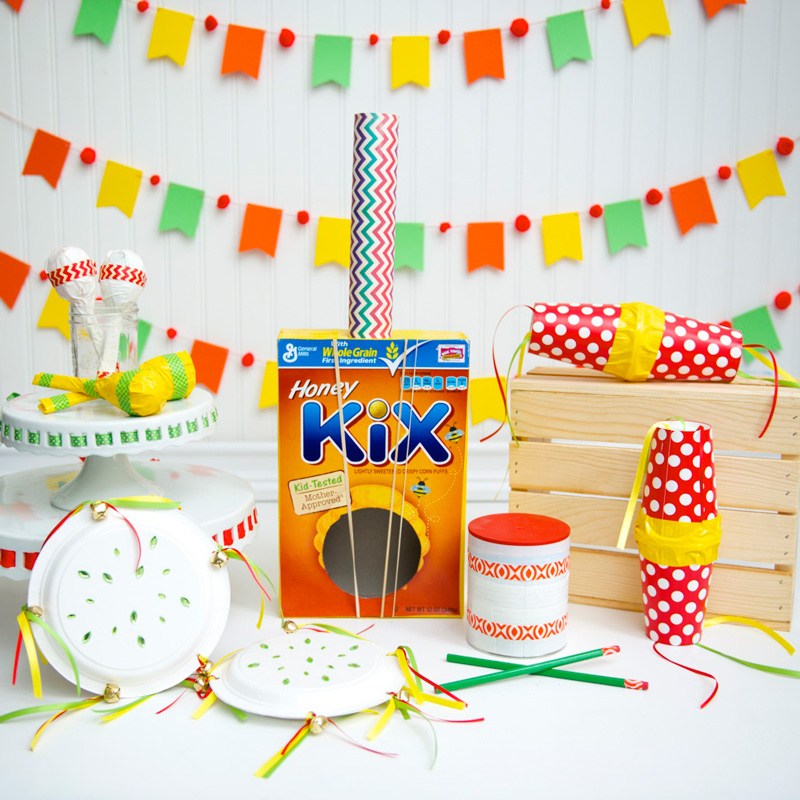
Cinco De Mayo is coming up and I wanted to incorporate the Mexican celebration with a musical themed kids party.
This music inspired party has lots of fun and LOUD (in a good way) DIY music instruments. Check out these fun music crafts!
There are SO many easy ways to turn ordinary things into musical instruments for kids to play with. Most of the stuff we have around the house already.
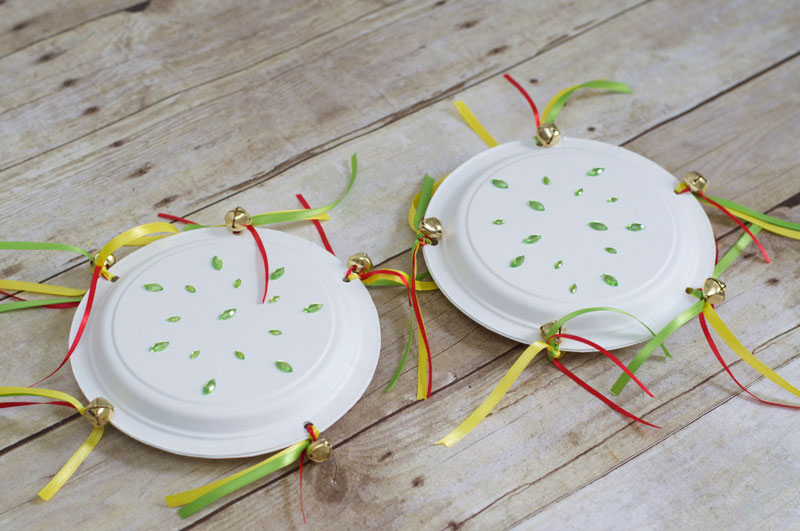
Paper Plate Tambourines
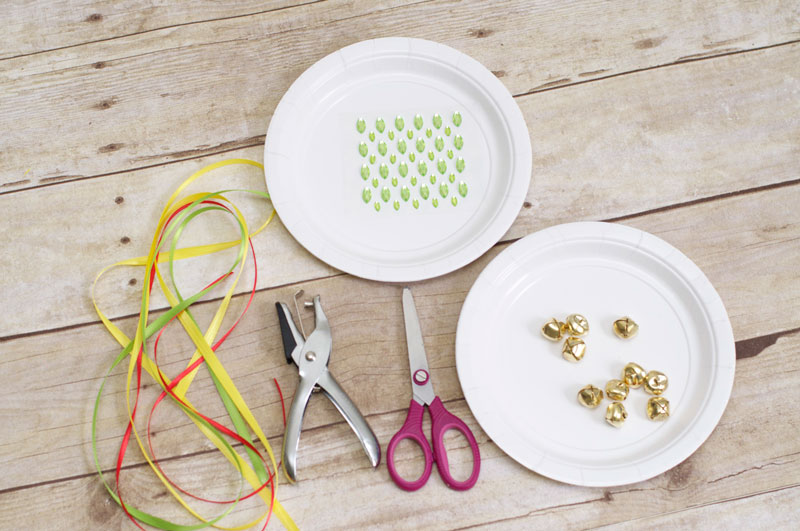
Materials
- Paper plates
- Ribbon
- Jingle bells
- Scissors
- Hole punch
- Adhesive jewels
Getting Started
Tambourines are a kid favorite with these simple materials, you will have them made in NO TIME!
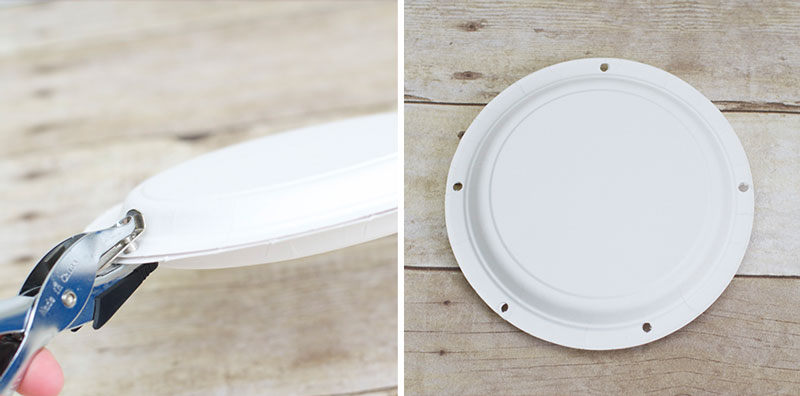
Step 1 – Punch Your Holes
Hold your paper plates together (having the BOTTOM part face out). Then, add your hole punches.
If you keep the plates together your holes will be EVEN all the way around your plates.
Step 2 – Add Your Ribbon and Jingle Bells
Cut your ribbon to the length desired and string your bell on one of the pieces of ribbon. Then, add your remaining ribbon and DOUBLE knot each one to securely keep it in place.
Super simple so far, right?
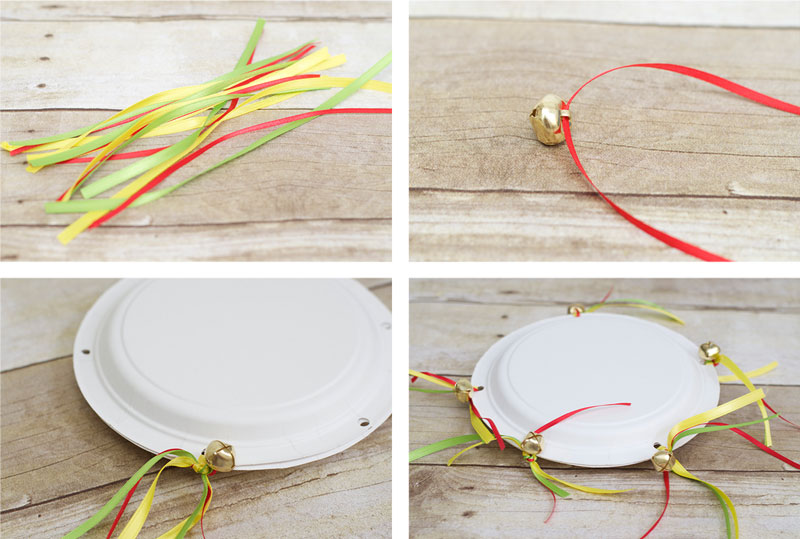
Step 3 – Add Your Sparkle
Now the FUN part! Have the kids decorate the outside of the tambourines. I found these adhesive jewels at the craft store for $1.00 a pack and was able to decorate BOTH tambourines with ’em.
…time for some colorful tambourine music!
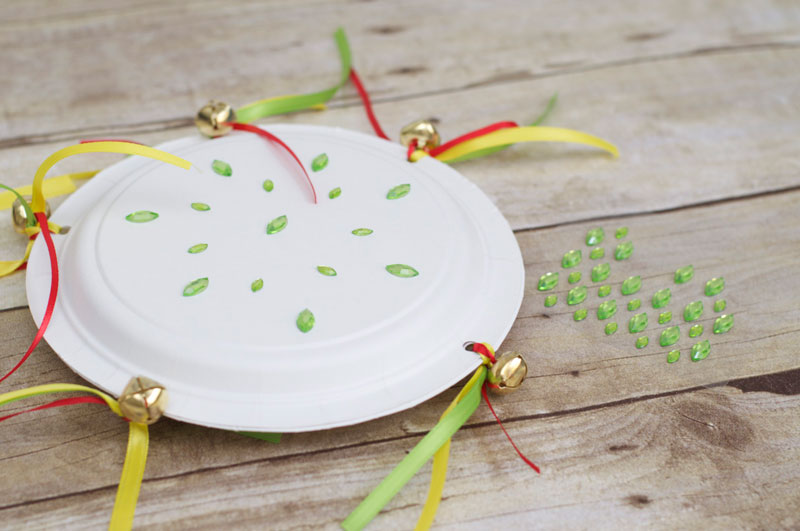
Finished Paper Plate Tambourine

Tin Can Drum

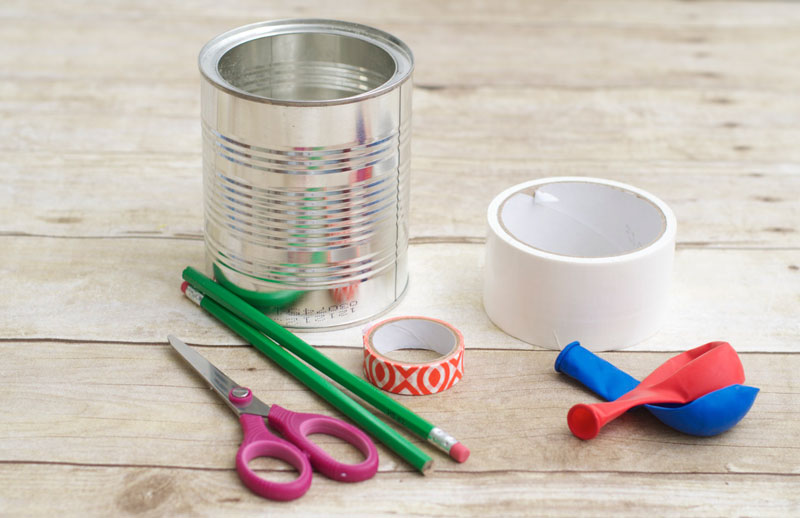
Materials
- Tin can
- Balloons
- Tape
- Decorative tape
- Scissors
- Pencils (2)
Getting Started
Kids just LOVE banging on things (I know my kids do). So lets give them a good reason to do it.
They will be making great beats in no time. PLUS, we made a matching drum stick to match!
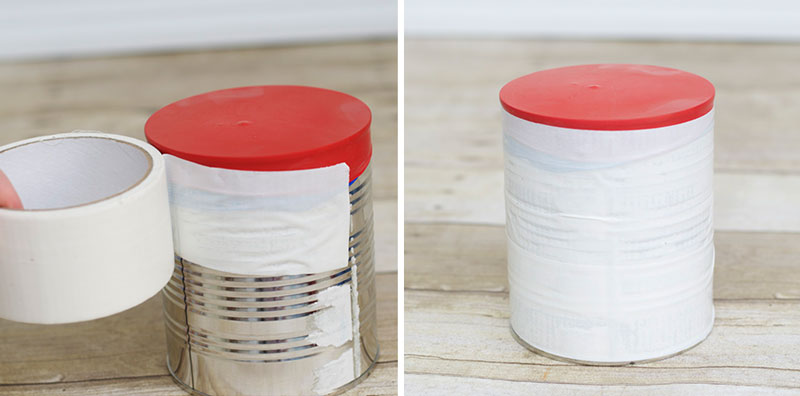
Step 1 – Skin Your Drum With Balloons
For our drum’s skin, we used 2 balloons, so our drum would be nice and STURDY. Cut the balloons about halfway up and firmly wrap them around your tin can.
I used an old formula can for the BOTTOM of the drum and it worked perfect. But any size can work great.
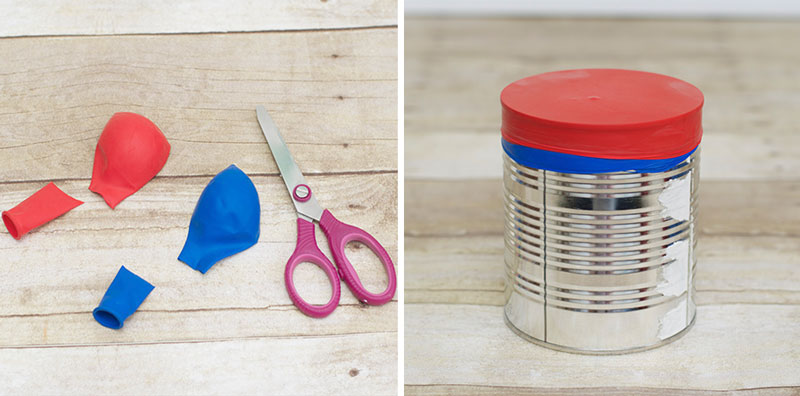
Step 2 – Secure Drum Skin With Tape
WRAP your can with tape (I found mine in the dollar section at the store) to prevent the balloon skins from popping off.
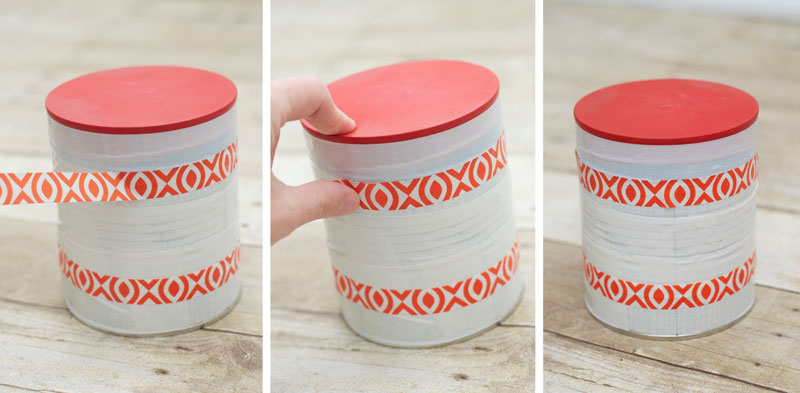
Step 3 – Add Your Decorative Tape
We added a decorative touch with some washi tape. It’s GREAT for kids to use because they are able to move it around easily to where they want it placed.
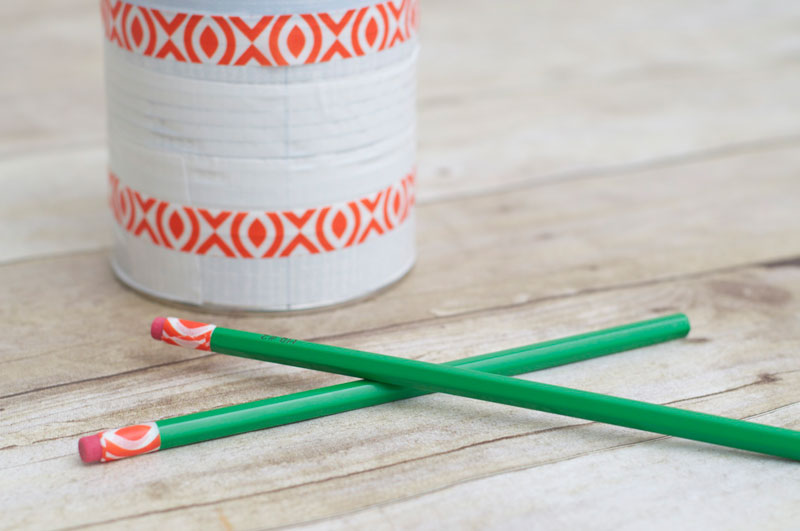
Step 4 – Make your Drum Sticks
For our drum sticks, we used some PENCILS and added a little more washi tape to the tips for a matching set!!
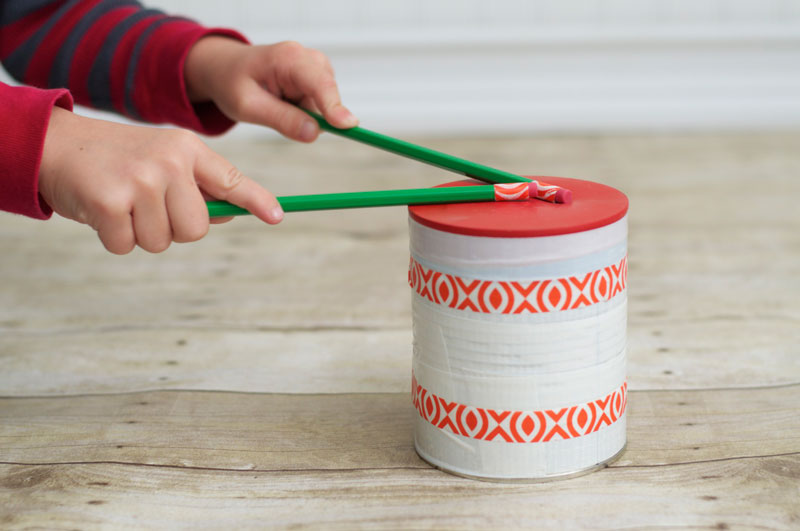
Now the kids are ready to DRUM IT UP!
Finished Tin Can Drum
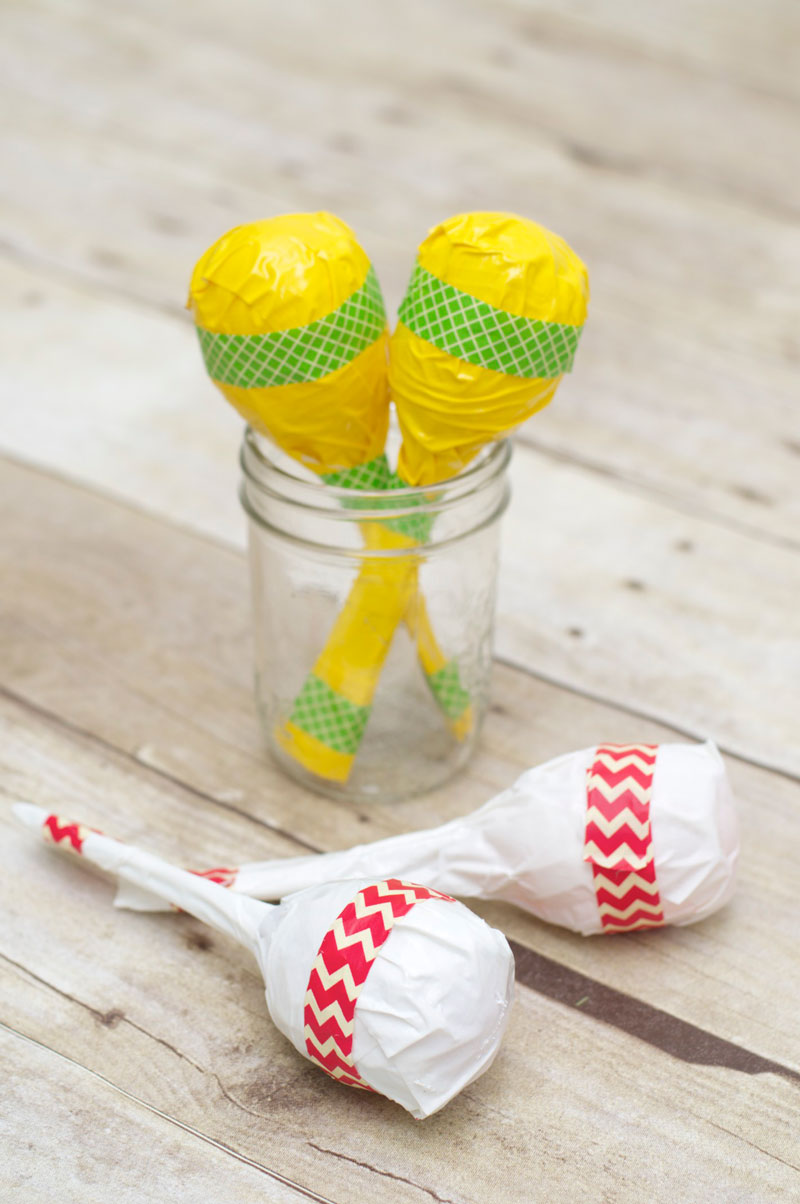
Plastic Spoon Maracas
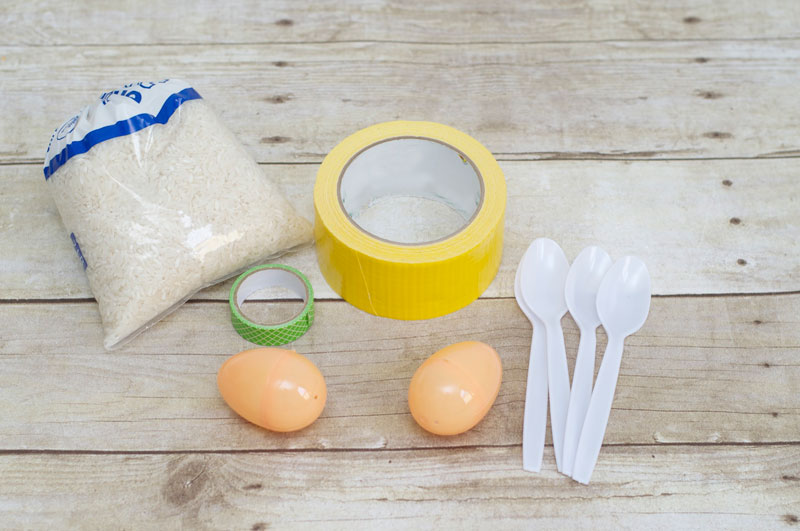
Materials
- Plastic eggs
- Plastic spoons
- Rice
- Washi tape
- Decorative duct tape
Getting Started
I think maracas are a STAPLE for any Cinco De Mayo music celebration. These plastic spoon maracas are so fun and such an easy craft to create!
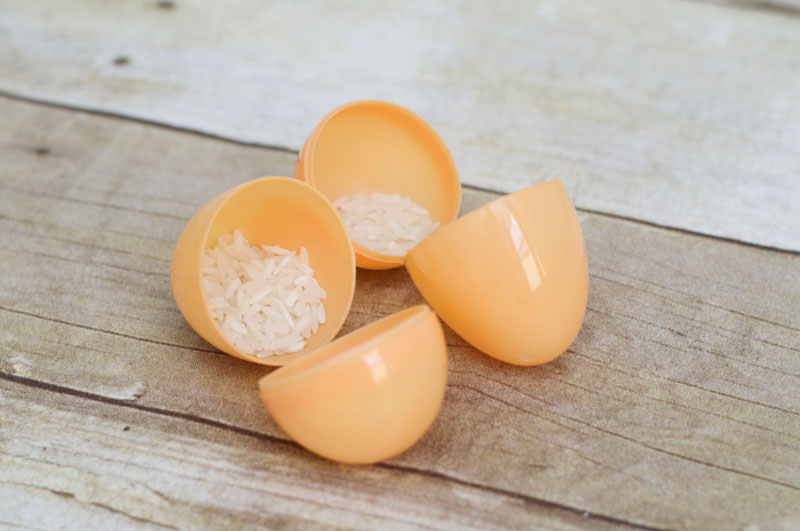
Step 1 – Add Your Rice
Add a little rice to your plastic eggs and close them up! You don’t need MUCH rice. Just fill each egg a third of the way.
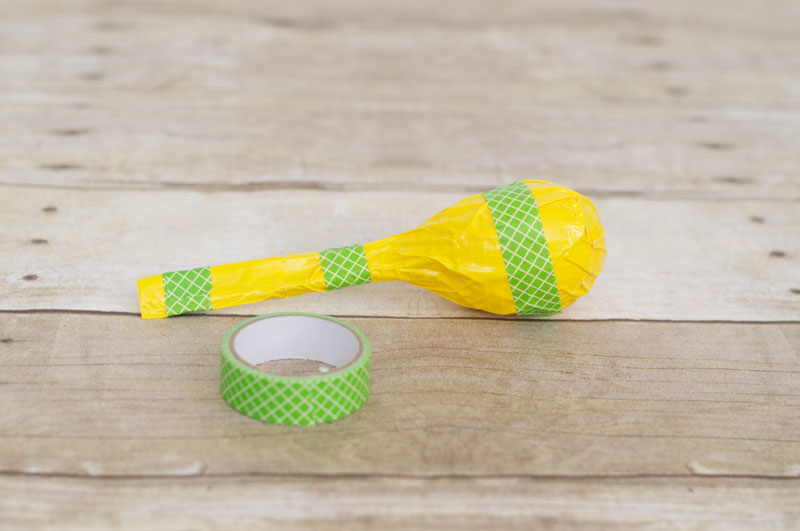
Step 2 – Create Your Maraca Shape
Place your egg between two plastic spoons and WRAP a piece of tape around it. Then, wrap another larger piece around the BOTTOM of your spoon and work your way to the TOP.
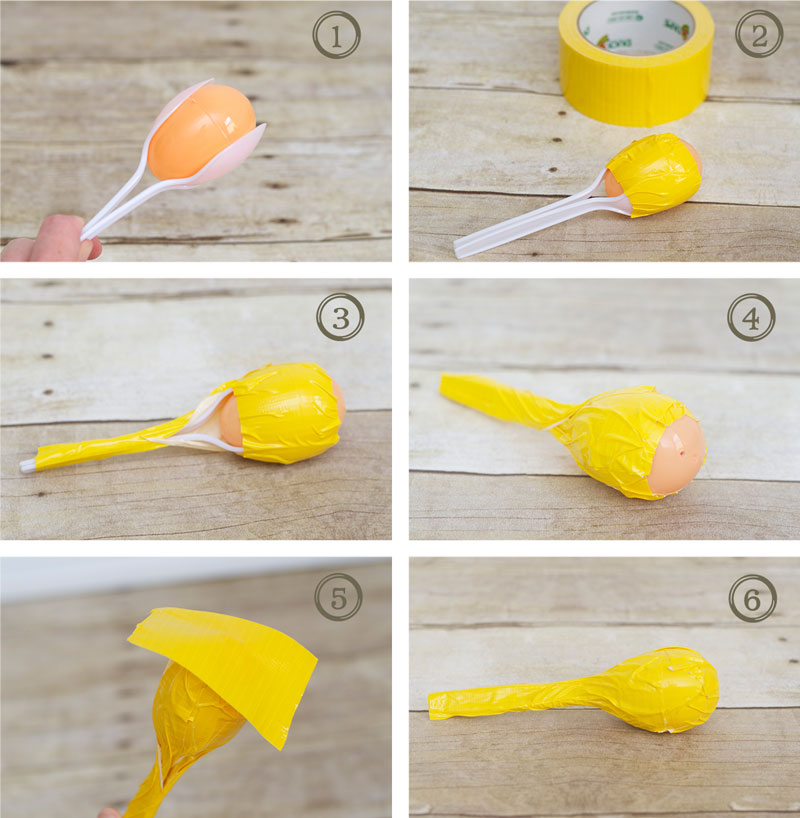
Step 3 – Add Your Decorative Tape
Then we added a little decorative tape for a nice finishing touch! Now we are ready to give them a GOOD SHAKE!
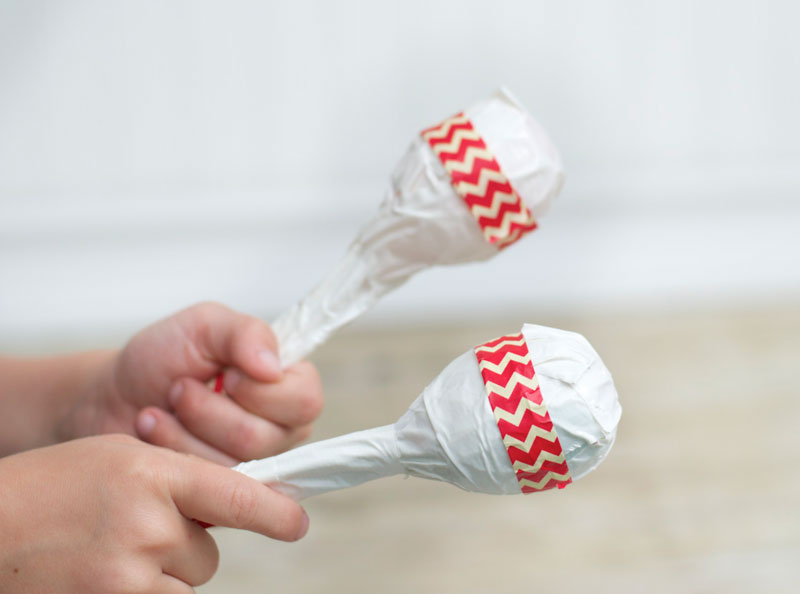
Finished Plastic Spoon Maracas
Paper Cup Shakers
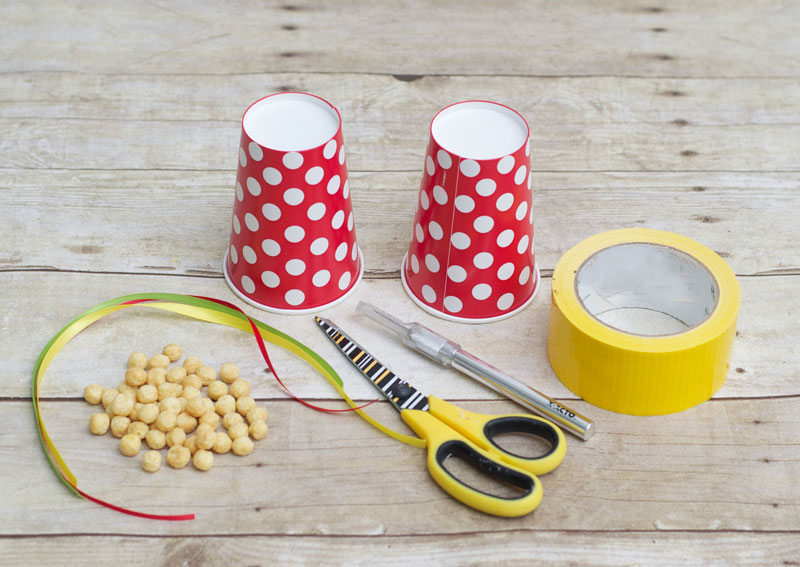
Materials
- Paper cups
- Ribbon
- Tape
- Kix cereal
- Scissors
- X-Acto knife
Getting Started
I really wanted to use Kix cereal in one of my musical instruments. But they were TOO big for the maracas, so I decided to make these cute shakers.
They worked perfect for these noise makers.
Step 1 – Add Your Ribbon
Parents need to add small slits to the bottom of the cups. I used an X-Acto knife for this.
Then, place your ribbon through the slits and tie a KNOT with all three pieces of ribbon.
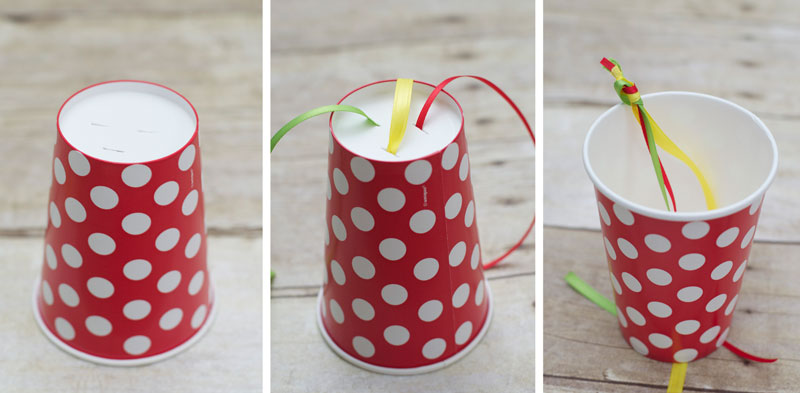
Step 2 – Pull Your Ribbon Through
NEXT, pull your ribbon through to the other side and you are ready for some Kix!

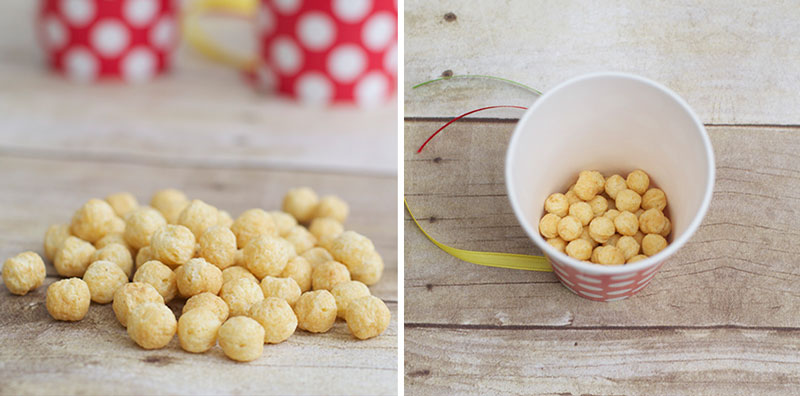
Step 3 – Add Your Kix Cereal
Place a HANDFUL of Kix cereal in your cup. Like the maracas, you only need to fill the cup about a third of the way.
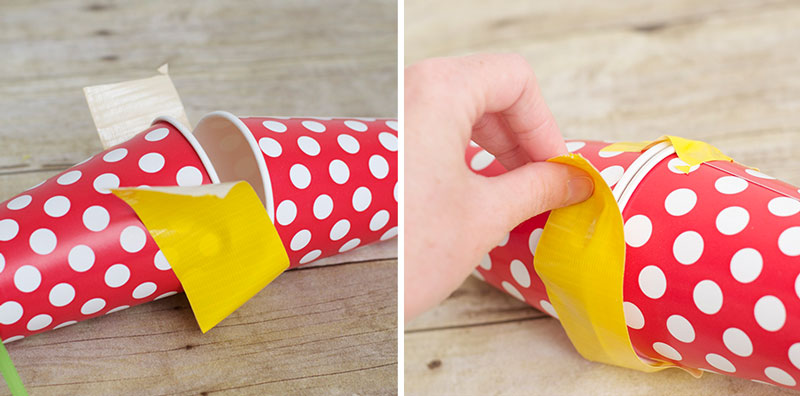
Step 4 – Add Your Tape
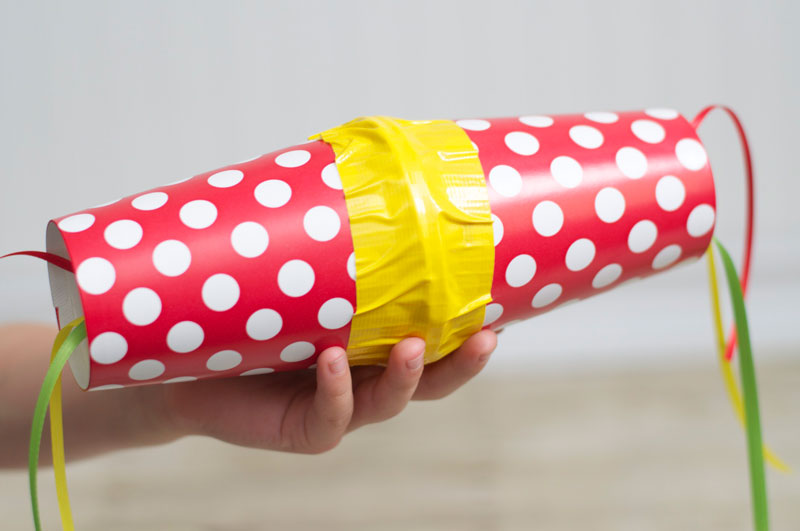
Bring the tops of the cups together and wrap tape AROUND the joint to secure the cups in place, voila all done!! Super simple shakers done in no time!
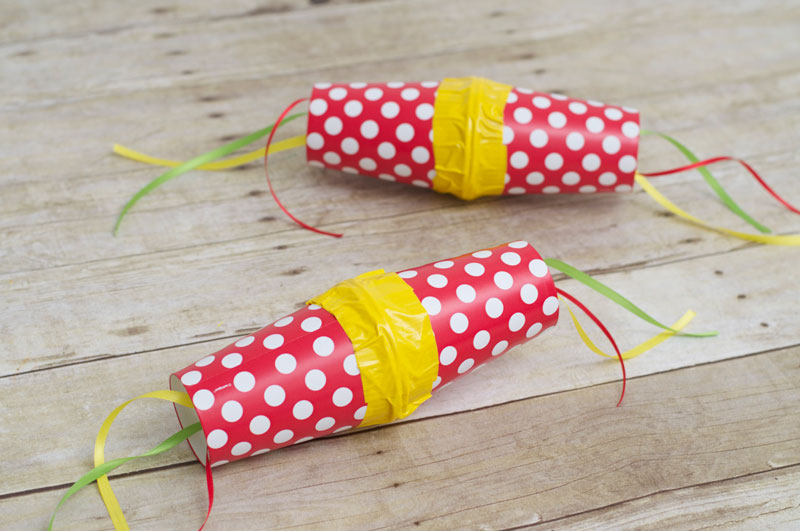
Finished Paper Cup Shakers
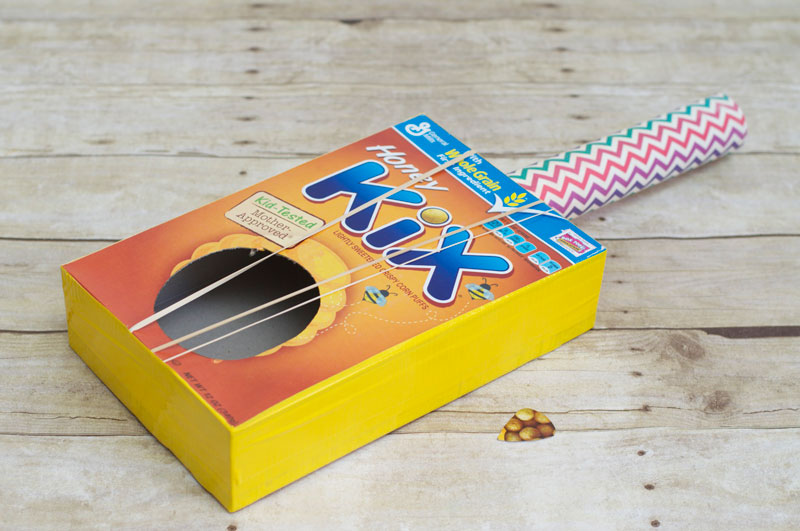
Cereal Box Guitar
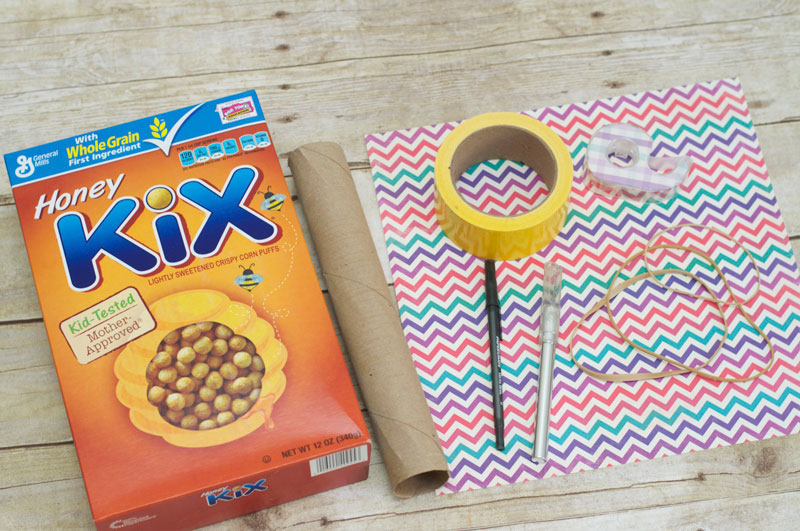
Materials
- Empty cereal box
- Paper towel roll
- Large rubber bands
- Decorative duct tape
- Scrapbook paper
- Tape
- Pen
- X-Acto knife (parents only)
Getting Started
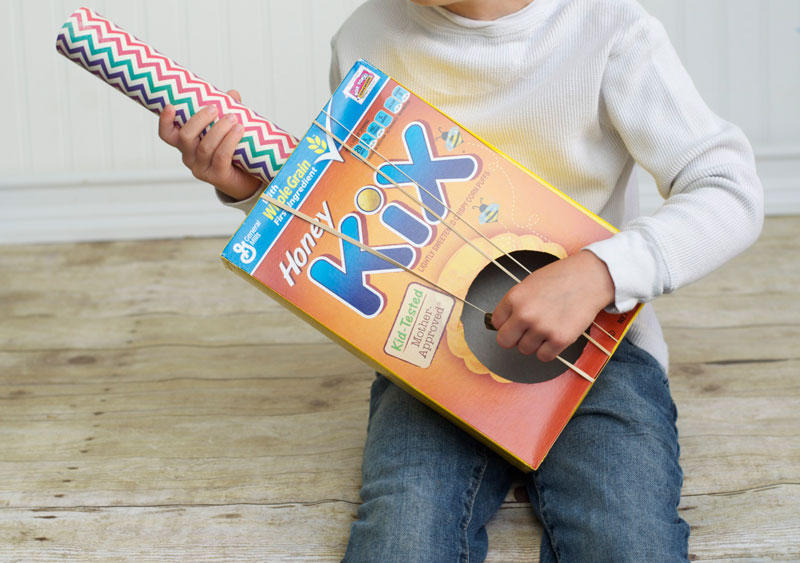
And OF COURSE I had to make a guitar out of a cereal box! I got the inspiration for my craft from this cereal box guitar from The Fraker’s Acres.
As you can TELL, the kids will have a great time jamming out with this cereal box guitar.
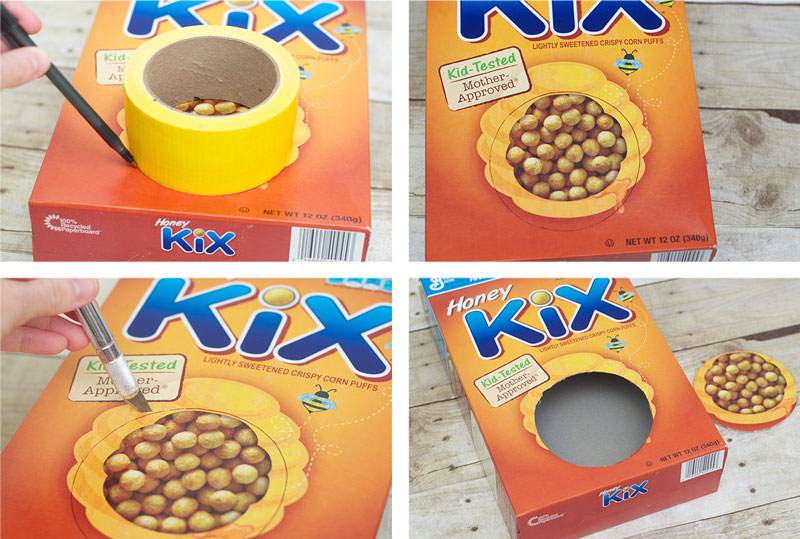
Step 1 – Trace and Cut Your Sound Hole
This part, the parents will NEED to do. Trace your circle and use the X-Acto knife to cut it.
I cut my sound hole over the honeycomb because I thought it looked cool.
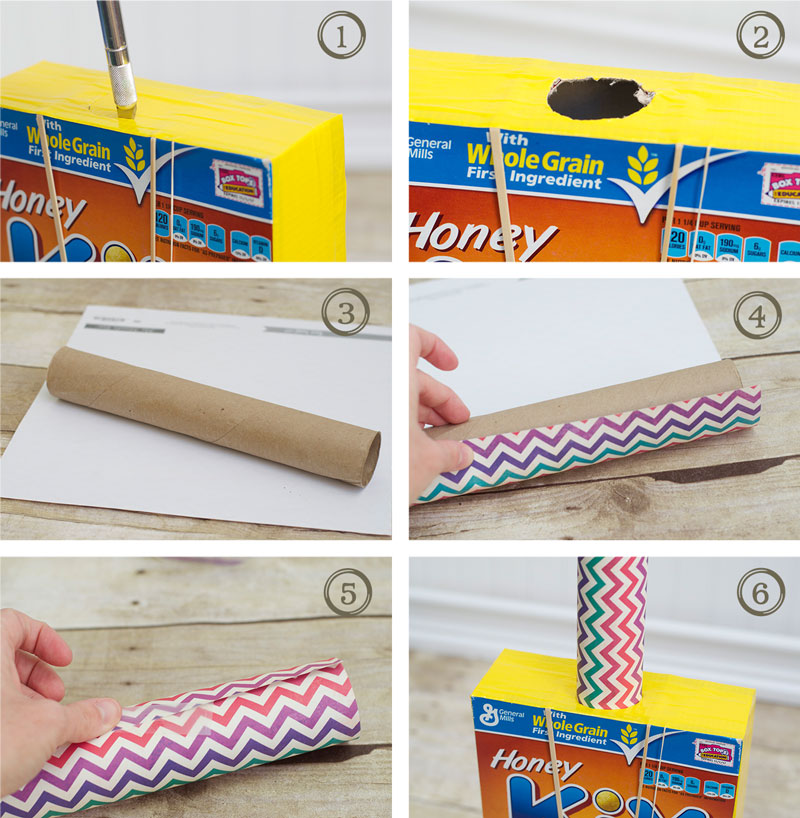
Step 2 – Add and Secure Your Guitar Strings
Add the rubber bands OVER the cereal box. I used 3 different sizes of rubber bands (for different sounds).
Wrap tape around the outer edge of the cereal box to keep the rubber bands IN PLACE and for a decorative look!

Step 3 – Make and Add Your Guitar Handle
This is another step that will NEED AN ADULT’S assistance. Cut a hole at the top of your cereal box that’s slightly larger than the diameter of your paper towel roll.
WRAP the scrapbook paper around the paper towel roll and secure into place with clear tape. Then, firmly press the paper towel roll into the hole.
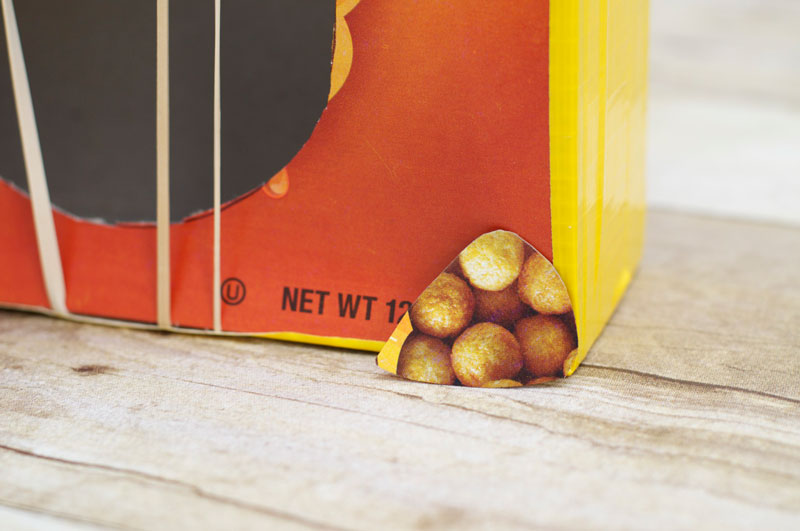
Step 4 – Make Your Guitar Pick
We of course had to have a GUITAR PICK! I just free handed the guitar pick with a pair of scissors. Ta’da all done!
Now it’s time to get your lil’ ones strumming!
Finished Cereal Box Guitar
Your little ‘kiddos will have a BLAST with these Cinco De Mayo inspired music instruments. I hope you found a lot of great musical INSPIRATION with these music party craft activities!


