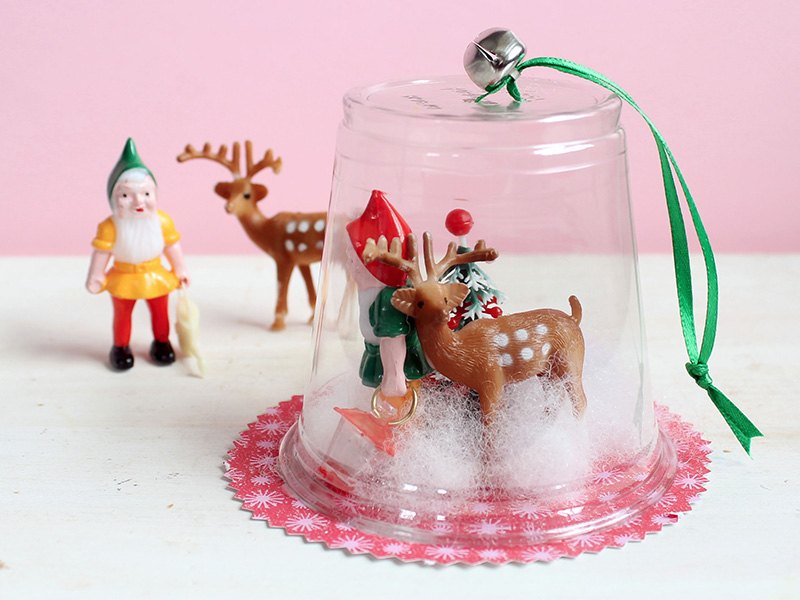
Plastic Cup Diorama Ornaments
The beauty of these diorama ornaments is in choosing what to capture inside the dome. Your kids can create any scene they like with any light-weight items, as long as it fits beneath the plastic cup. They can also craft their own figures, or, use miniatures.

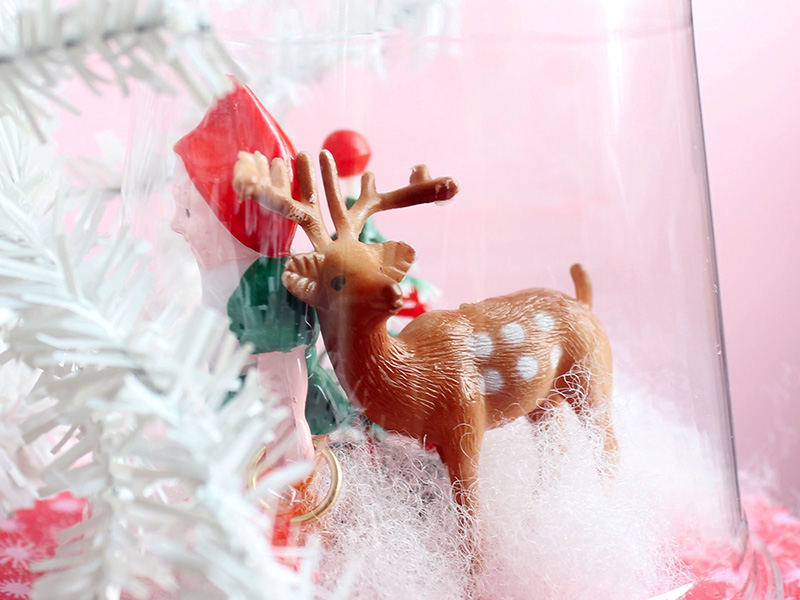
Cotton balls, pom poms, pipe cleaners, and doll house accessories are good choices. My favorite items to use in these ornaments are cupcake toppers from specialty stores. Any figure you can imagine comes in a cupcake topper.
How to make diorama ornaments.
You will need:
Decorative cardstock or heavy weight paper
Plastic cups
Pencil
Pinking shears or decorative scissors
Thumbtacks
Needle (Make sure to supervise or handle for the little ones!)
Thin ribbon
Jingle bells (optional)
Cupcake toppers, pipe cleaner figures, dollhouse miniatures, etc. for the scene
Pillow fiberfill or bunting, or cotton balls
Craft glue
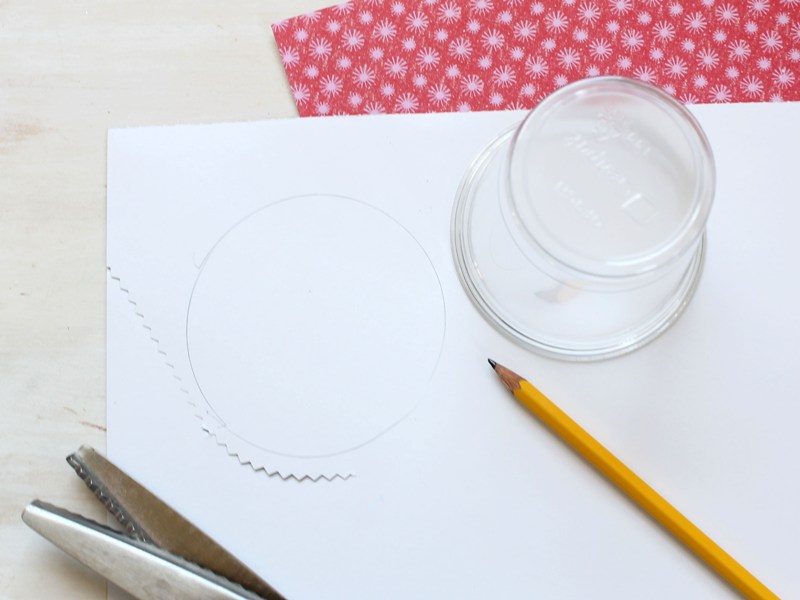
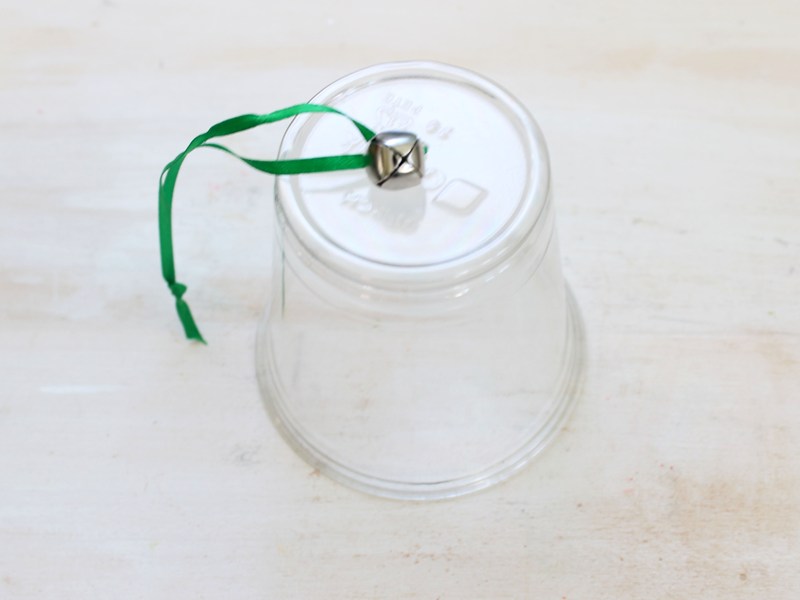
Trace the cup’s rim on the back of a piece of decorative paper. Use pinking shears or decorative scissors to cut out the circle, cutting ¼ inch outside the pencil mark so the finished circle is larger than the rim of the cup.
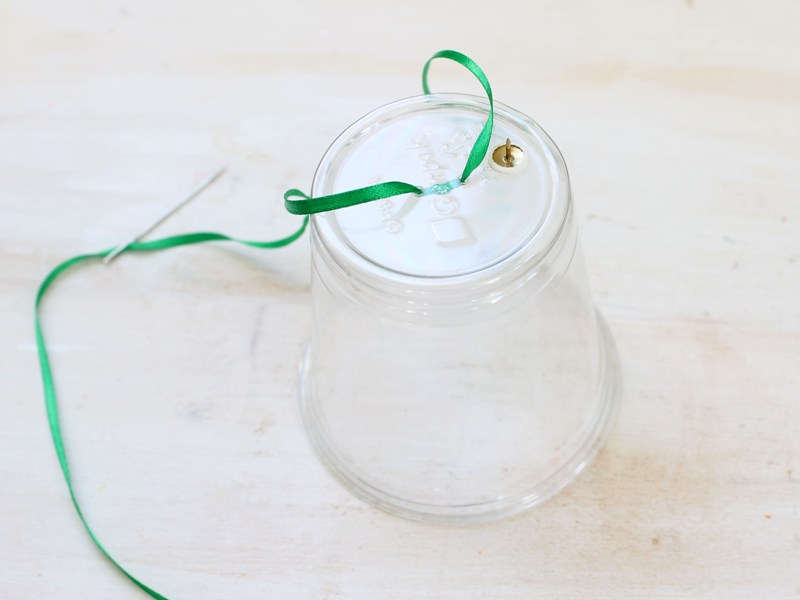
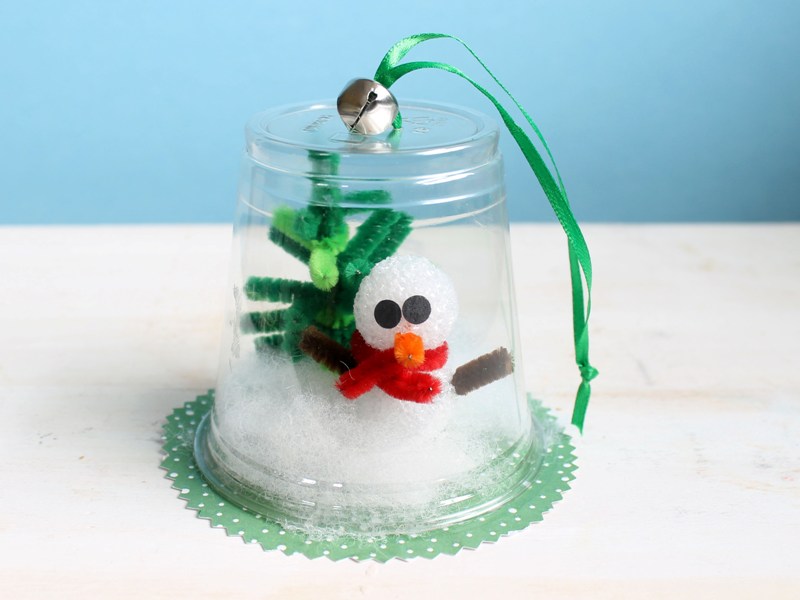
These next few steps are best handled by an adult. Use a thumbtack to poke two holes ½ inch apart on the bottom of the cup. Use the needle to thread the ribbon through the holes so both ends of the ribbon are outside the cup. Slide the ribbon ends through a bell, if using, and fit the bell up against the cup. Tie the ends of the ribbon to make a loop. Set aside.
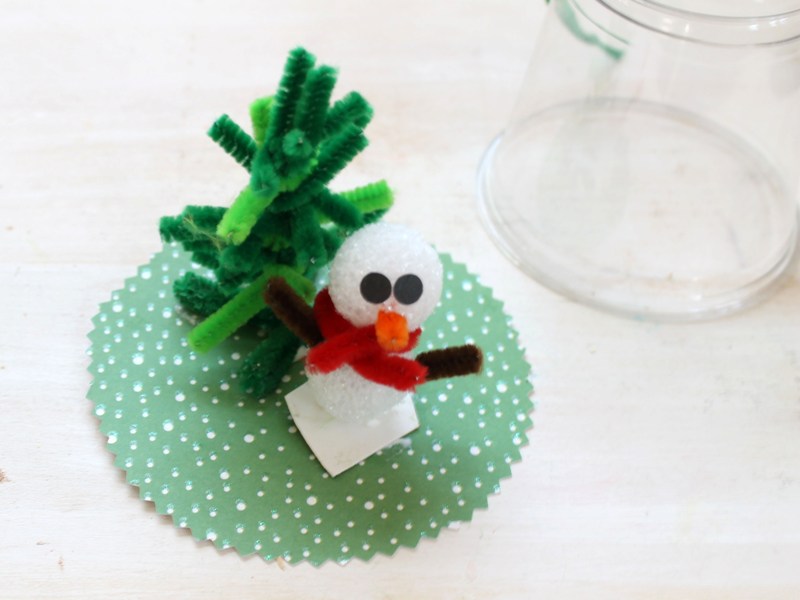
On the printed side of the paper circle, create your scene! Use any tools you like, including pictures cut from magazines, glitter for snow, tiny figures from the craft store. Specialty cake decorating shops sell every imaginable cupcake toppers that work wonderfully to create mini-dioramas. (For how-tos to make the snowman and tree, see below.)
To assemble your ornament, generously glue figures to the center of the paper circle. Hold for 20 seconds to secure. Dab glue around the figures and add small pieces of fiberfill, bunting or cotton balls. Test that the arrangement fits inside the cup. Then pipe a line of glue over the entire rim of the cup, and place the cup over the arrangement. Press firmly on the paper for 20 seconds, then set aside to fully dry.
How to make a snowman and tree.
You will need:
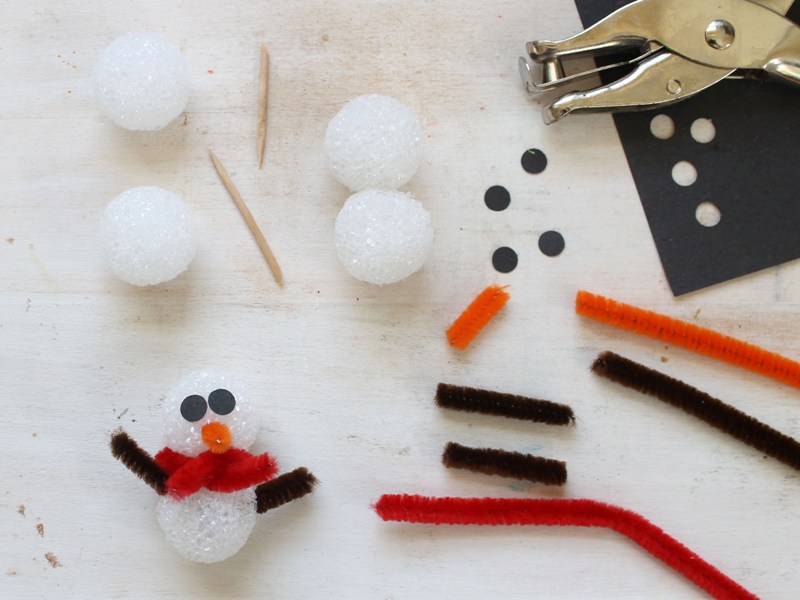
2 1-inch Styrofoam balls
Toothpick
Black paper
Hole punch
Craft glue
Pipe cleaners (orange, brown, green and another color)
Scissors
You may need: pins and sturdy paper
To make the snowman, attach two Styrofoam balls together with a piece of toothpick and a dab of glue. For the eyes, use a hole punch to cut out circles from black paper and glue to the Styrofoam ball. Cut a ½-inch length of orange pipe cleaner and insert for the nose. Cut 1-inch pieces of brown pipe cleaners for the arms. Cut a 3-inch length of pipe cleaner for the scarf. TIP: To help the snowman stand, cut a small square of stiff, white paper and use a flat thumbtack or a pin to attach to the bottom of the snowman.
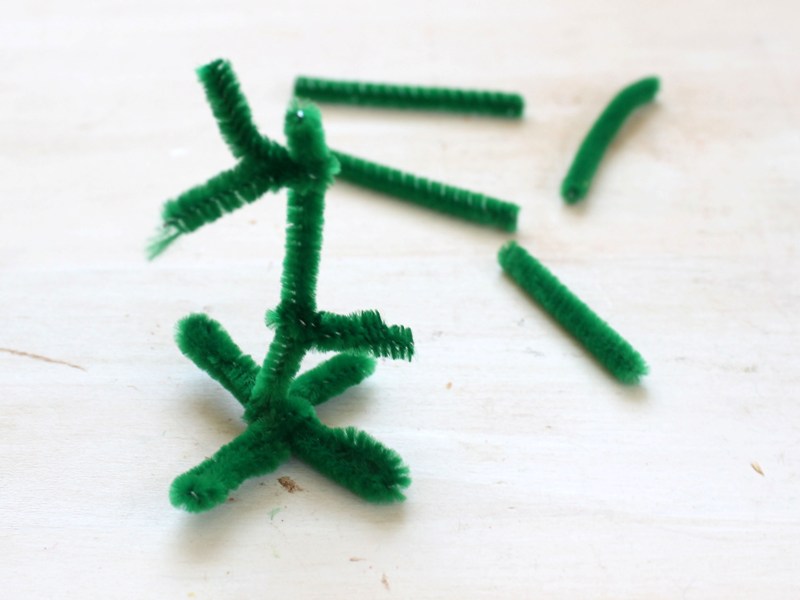
To make the tree, twist the bottom of a green pipe cleaner to make a stand for the tree. Trim the top of the tree so the total height is about 2 ½ inches (or small enough to comfortably fit in the cup). Cut varying lengths of more green pipe cleaners and bend each around the first pipe cleaner to make branches.
Meaghan Mountford, author of Sugarlicious: 50 Cute and Clever Treats for Every Occasion, has been creating crafty sweets for 15 years. She is especially fond of decorating cookies, marshmallows and putting sweets on sticks. See more on her blog, the decorated cookie.